How Persistent Cart Works in Magento 2

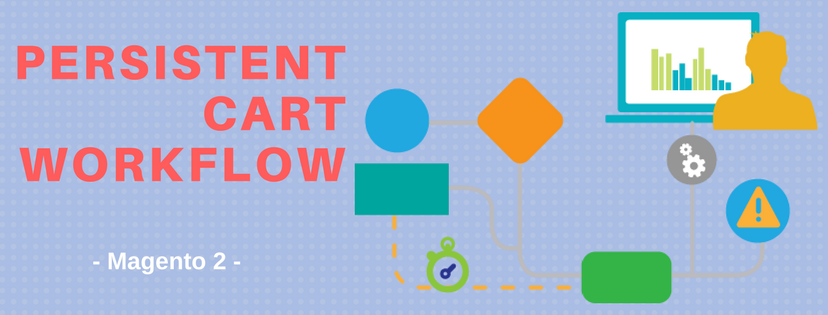
In Magento 2, the Persistent Shopping Cart does not necessarily follow a solid workflow. In other words, it depends on the value in the backend settings. For each value set to the “Enable Remember Me” and the “Clear Persistence on Logout” fields, the Persistent Cart works in a different way. It also depends on the admin’s decision to select or clear the “Remember Me” checkbox.

When a persistent cookie is activated, a “Not%[the last user’s name]%?” link (Not %John Smith%? for example) will appear in the top of the current page. The function of that link is to give customers options to close the persistent session and start working as a guest or to log in with another account. In addition, the persistent cookie has impact on the workflow of persistent shopping cart. Because it helps to maintain settings for the Shopping Cart, Wish List, Recently Ordered Items, Currently Compared Products, Comparison History, Recently Viewed Products, and Customer Group associations.

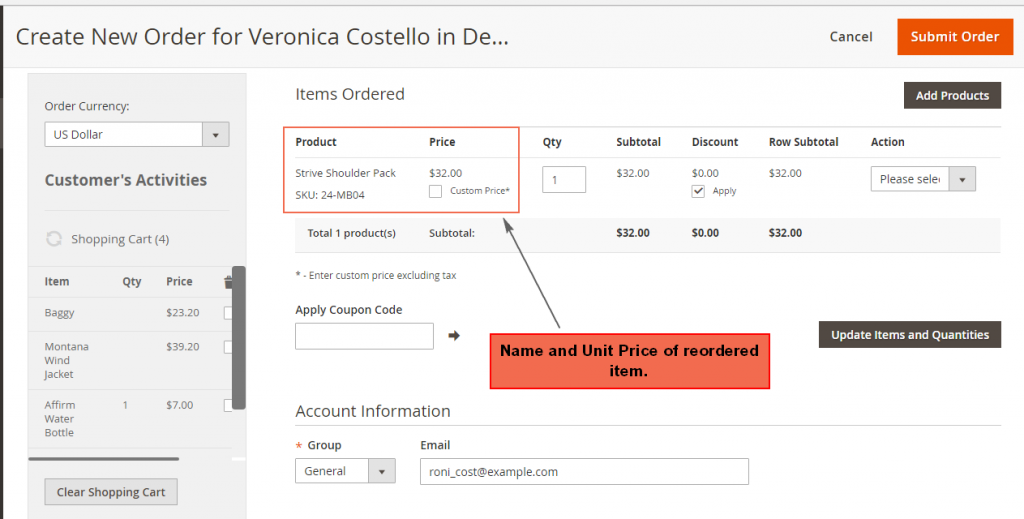
The system can also keep tracks of the shopping cart contents, no matter which devices your customers use to shop. For instance, at first, a shopper uses a laptop to add items to her cart. She then can edit the cart contents from a mobile device, and complete the checkout process from a tablet or a desktop computer.

Your store can create and maintain an independent persistent cookie for each browser that is used by a customer to log in or create an account once the persistent shopping cart is applied. Thanks to the persistent cookie, any changes made will be updated to browsers even if the customer use more than one browser for one time shopping on your store.

There are four common effects on the persistent shopping cart workflow, which depends on the settings below:

Situation 1: Enable Remember Me = “No”

Clear Persistence on Log Out = any value

Effects: The Remember Me checkbox is not available when customers on the login and registration pages. The persistent cookie is not applied.

Situation 2: Enable Remember Me = “Yes”

Clear Persistence on Log Out = any value

Remember Me = (not being selected)

Effects: The session cookie is applied as usual; the persistent cookie is not used.

Situation 3: Enable Remember Me = “Yes”

Clear Persistence on Log Out = “Yes”

Remember Me = “Yes”

Effects: Both session and persistent cookies are enabled when customers log in. These two cookies are also terminated when buyers finish shopping and log out. If a customer does not log in, but the session cookie become invalid, the persistent cookie still keep working. If a customer does not log out, the persistent cookie can also be deleted if its lifetime is out of due or if the customer clicks the Not %John Smith% link.

Situation 4: Enable Remember Me = “Yes”

Clear Persistence on Log Out = “No”

Remember Me = “Yes”

Effects: Both cookies are used when customers log in. When shoppers log out, only session cookie is closed. Persistent cookie is deleted only when its lifetime runs out or when the buyer click the Not %John Smith% link.

Clearly understand how Persistent Shopping Cart works with different values set to it will help you a lot in managing your online store. Therefore, come back to the beginning and read again this article if you still confuse about Persistent Shopping Cart workflow. If not, keep follow us to receive more instructions about Persistent Shopping Cart in Magento 2.

How to Configure Cart Thumbnails in Magento 2

Cart Thumbnails are small images that appear in the cart when customers shopping online. These undersized pictures help to give online buyers an overview of the product they are about to spend money on. If a customer buys a simple product with specific color, then ideally, the Cart Thumbnails should match that product.
thumbnail-images

However, the thumbnails do not always show exactly what the product is (in terms of size, color, or length). In other words, it is impossible to display all the variations of a configurable or grouped product which have multiple options to choose. For these two types, Magento 2 allows admin to select the Cart Thumbnails images from either their “parent” products or from the product variation.

To configure Cart Thumbnails images for Configurable and Grouped products in the current store view, do the following:

  1. Firstly, sign in with your admin account. On the Admin sidebar, select Stores.
  2. Choose Configuration under Settings.
  3. Expand Sale on the left panel, then click Checkout.
  4. Click the drop-down icon in the Shopping Cart section. Now you can do the settings:
  • Grouped Product Image: Set it to “Parent Product Thumbnail” if you want the thumbnail image for grouped products to be selected from parent product. Set it to “Product Thumbnail Itself” otherwise.
  • Configurable Product Image: Select the “Parent Product Thumbnail” option if you want the thumbnail image for configurable products to be selected from parent product. Otherwise, select the “Product Thumbnail Itself” option.Configure Cart Thumbnails
  1. When you finish the settings, tap Save Config (on the upper-right corner of your working screen) to save changes.

You may need to refresh the caches by clicking the Cache Management link when the system note appears.system-note Cart Thumbnails

Now, go to your store’s backend and see what you can do with thumbnail images for your products to improve your customer’s shopping experience.

We have presented Cart Thumbnails in Magento 2. We hope that this article can show you useful information to select the appropriate extension for your online shop. Don’t forget to Like, Share, and Subscribe to Magestandard for more informative Magento extension review articles.


What Are Types of Product in Magento 2?

Types of Product can be defined as a group of goods or services that share some common specific characteristics. Different product types can be determined based on various basis such as the basis of purchase frequency (Convenience products, Shopping products, Specialty products,…) or the basis of offering (goods, services, ideas),… For Magento 2, it sets the Types of Product based on the basis of their features. There are six different types that Magento 2 users can set to their products. They are Simple Product, Configurable Product, Grouped Product, Virtual Product, Bundle Product, and Downloadable Product.

Simple Product

Simple-product

In Magento 2 platform, a simple product is a single physical good with a unique SKU. The price and other input information of a simple product can be configured through the backend of Magento 2, allowing store owners to sell variations of simple products with a single SKU. In addition, a simple product can be sold individually or combined with others to create a Group Product, a Bundle Product or Configurable Product with customized options.

Configurable Product

Configurable-product Types of Product

Like Simple product, Configurable product is also a single product. However, a configurable product has a number of options (such as size, weight, or color) to be selected before a customer can add it to card. Each option represents a separate simple product with a distinct SKU, which make it easier to control the inventory.

Grouped Product

Grouped-product Types of Product

As its name indicates, a grouped product includes a number of standalone products. A set of Yoga straps can be a good example of this Types of Product. Among a set of Yoga Straps that includes 3 straps with different length, a customer can select only one or all types of these straps for a purchase.

Virtual product

Virtual-product

Virtual products are intangible products like services, memberships, warranties, or subscriptions. In Magento 2, virtual products can be used to create grouped and bundle products.

Bundle Product

Bundle-product

Like Grouped Product, each item in a bundle product is a separate, standalone product. Nevertheless, items in a bundle aren’t just combined by fixed products like in a group but they are customized to buyer’s preferences. The bundle could be a gift basket, or computer components.

Downloadable Product

Types of Product

A downloadable product is a digital product such as a video or a pdf file . It includes files that directly reside on your server or being compressed to a URL link to download.

With these 6 Types of Product, you can confidently update products to your online store(s) and bring the best shopping experience to customers.

How to Activate Reorder in Magento 2

When discuss about supporting tools for Shopping Cart in online stores, it is Magento 2 that provides a lot of options for store owners to better manage their electronic sales. One of these is Reorder Option in Sales Configuration. If Reorder is enabled in the backend, registered buyers can edit their existing orders right in My dashboard section.reorder-in-frontend

To activate Reorder Option, follow the steps below:

  1. Log in the backend with an admin account. On the Admin sidebar, tap Stores.
  2. After that, click Configuration in the Settings section.
  3. On the left panel, expand the SALES row and select Sales then.
  4. Scroll down to the Reorder section. Set it to your preference:
  • “Yes”: Allow customers to reorder in My dashboard section.
  • “No”: Reorder is not allowed. Because Magento 2 set the field to “Yes” as default, you should clear the Use System Value checkbox before choosing this option.configure-reorder
  1. Lastly, tap Save Config on the upper-right corner to confirm your settings. You may need to reindex the data and refresh the cache by clicking the Cache Management link when the system note appears.refresh-cache-management

Once Reorder is enabled, it is not only buyers can edit their orders but also admins can do it from the backend. To reorder for an existing order in the backend, do the following:

  1. On the Admin sidebar, click Customers. Next, select All customer.
  2. You can either use the filter to search for a specific customer (search by name, or email, or tax code,…) or enter the keyword(s) to the search box on the upper left corner. You might need to refresh the filter to clear all the previous filters before adding a new one.
  3. After finding the customer, click edit in the Action column.
  4. On the left panel, tap Orders under Customer Information. Here you can see all the orders that the selected customer has placed. Click Reorder Option in the last column of the order that you want to edit.
  5. Next, edit the order to your preferences.reorder-in-backend Reorder Option
  6. Tap Submit Order to save the changes. 

That is all about Reorder Option in Magento 2. We hope you enjoy the information and don’t forget to follow us to receive more knowledge about Magento 2.

A Detailed Explanation of Message Inbox in Magento 2

When you log in the Admin account, you sometimes receives messages from Magento on a regular basis. In this article, you will have an introduction of Message Inbox in Magento 2.

message-inbox-magento

What is Message Inbox?

The bell icon in the header displays notifications of unread messages in your box. The content of messages includes patches, new releases, system update and forthcoming events.

Regarding messages of critical importance, they keep appearing in a pop-up window whenever you sign into your account. These notifications disappear only when you mark them as read or remove them.

With the notice grid lists, you can see all messages and carry out actions such as viewing detailed information, marking messages as read and deleting them from the inbox. Moreover, notifications are rated by severity and shown with the most recent at the top.

Message Inbox In Magento 2

Explore Incoming Messages

  1. Click the bell icon in the header then read the summing-up and do any of these options:
  • Tap the message to view full content if needed
  • Choose the delete icon on the right of the message to remove the messsage
  • Select See All to show the Notifications grid
  1. In terms of urgently important messages, do one of the following:
  • Tap Read Details
  • Click Close to remove the popup but keep the message active

See All Notifications

  1. Do one of two choices:
  • Click the Notification icon in the header -> Choose See All in the footer of the summary
  • Select System on the Admin Sidebar -> Tap Notifications under Other Settings
  1. Do one of the following in the Action column
  • Click Read Details to view more information (a new window including the linked page exists)
  • Choose Mark As Read to hold the message in your inbox
  • Use Remove tab to erase the message
  1.  If you want to apply an action to many message, choose one of two options:
  • Mark the checkbox of each message you need in the first column
  • Set the Mass Actions control to choose multiple messages
  1. To set the Actions control, do any of the following:
  • Mark as Read
  • Remove
  1.  Click Submit to finish the process

Configure Notices

  1. Choose Stores on the Admin Sidebar -> Select Configuration under Settings
  2. Tap System under Advanced in the left panel
  3. Widen the Notifications part and do these steps:
  • Apply Yes to Use HTTPS to Get Feed if your store Admin runs over a secure URL
  • Set Update Frequency to choose how often your inbox is updated and the interval can be from one to twenty-four hours
  1. Select Save Config to complete

We have presented about Message Inbox in Magento 2.  We hope that you have had the details about message inbox in Magento 2. If you need any help, please feel free to contact us.