An Introduction of Export Criteria in Magento 2

In Magneto 2, Export Criteria contains two factors, these are Export Filters and Export Attributes. In this article, we would like to give you an overview of these two. Let’s take attendance below to get more information about them.

Export

Export Filters

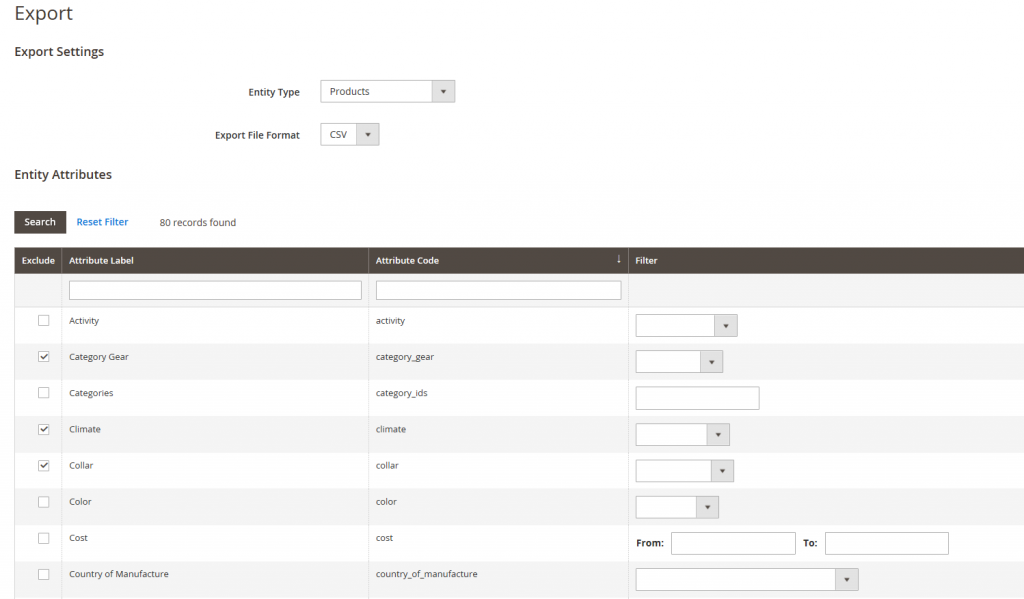
Export filters are used as a kind of tools which can help you determine the data they want in the export file based on attribute values. Furthermore, you can designate which attribute data you want to include or exclude from the export as wish. The types of filter complement with all types of database.

In order to choose exactly SKUs you aim to be included in the export file, filters will help you to determine. For instance, if you select Women in Gender filter, the exported CSV file will contain only products for women.

Date and time is also supported to be filtered in the export part. You just need to choose the date from the Calendar, then, all the information on that day will be exported with CSV file.

If you intend to include only database with a particular value, such as SKU, please enter the value into the Filter field. Besides, there are some fields such as Weight, Price, Dynamic SKU, VAT number, and Set Product as New have a form/to range of values.

Exclude Attributes

Let’s take a look at the the first column on the left, you can realize that the checkbox is used to exclude attributes from the export file. If you do not want an attribute to appear in exported files, you can choose that attribute in Exclude column by clicking.

In short, that is all the knowledge of Export Criteria in Magento 2 we want to share with you. If you find it helpful for you, please Like, Share and Subscribe to keep updating for more upcoming blogs!


How to Configure Online Session Length in Magento 2

All the information that is given by customer when they register into your system and the customer’s experience during the registration process is determined in the customer account settings. Here are six factors included in configuring customer account: Online Session Length, Customer Account Scope, Login Landing Page, New Account Options, Name and Address Options, Password Options. Thus, in this article, we would like to give you an overview of Online Session Length and how to configure it in the customer account setting.

An introduction of Online Session Length in Magento 2

The Online Session Length is included in the customer account settings. For your information, fifteen minutes is the default length per customer session.

The current session automatically ends if you do not have any interaction with keyboard during active time. After that, customers have to log in to their accounts again to continue shopping. If customers set Enabled for Persistent Cart, in the next time they log in to their accounts, they still see the contents of their carts before. In addition, the online session length totally can be configured by admin in the customer account setting.

How to configure Online Session Length in Magento 2

To configure the online session length, do the following:

  1. Open the Admin home page. Then take a look at slidebar and click on Stores symbol. Next, choose Configuration under Settings.
  2. In the board on the left, expand Customers and choose Customer Configuration.
  3. When Customer Configuration appears, expand the Online Customers Options sector.
  4. In the Online Minutes Interval area, enter the number of minutes you want to set for one online customer session length. You are allowed to leave that field empty and then the interval time will be set to default by fifteen minutes.
  5. If you are ready to save information, click on Save Config button to finish.

We have presented about Configuring Online Session Length in Magento 2. We hope that this article can show you useful information to select the appropriate extension for your online shop. If you find it helpful for you, please Like, Share and Subscribe to keep updating for more upcoming blogs!