Features of Customer Sign In in Magento 2
For customers who already Sign In with your store, they are able to get a range of benefits such as fast checkout because all of their information is already recorded in their accounts and self-service with updating their information, check the status of orders and so on.
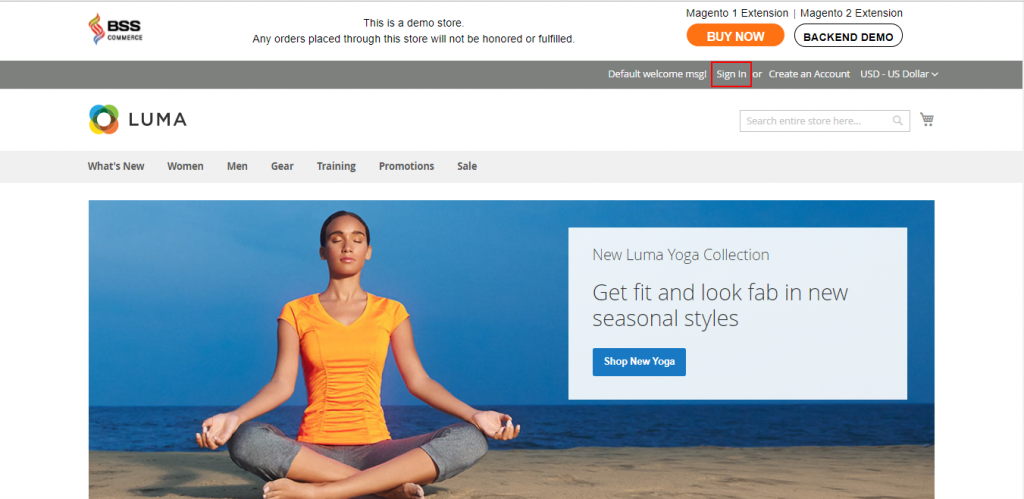
In Magento 2, customers can easily access to their accounts from every page in your store with an invitation “Log in or Register” displaying in the header. When completing log in to their account into your online store, customers can be redirected to their account dashboard or the page customers opened before still displays as a current page after they log in. Moreover, customers totally can reset their password if they do not remember at all with a reset link sent to the email address which is associated with their account.
The way to sign in to your customer account
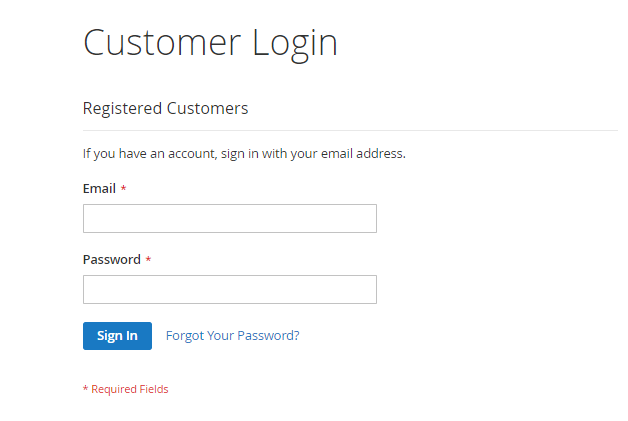
- Click Sign in button in the header of the store
- When Customer Login page appears, fill your Email Address and your Password that you registered before. After that, tap Login button to finish.
The way to reset your password
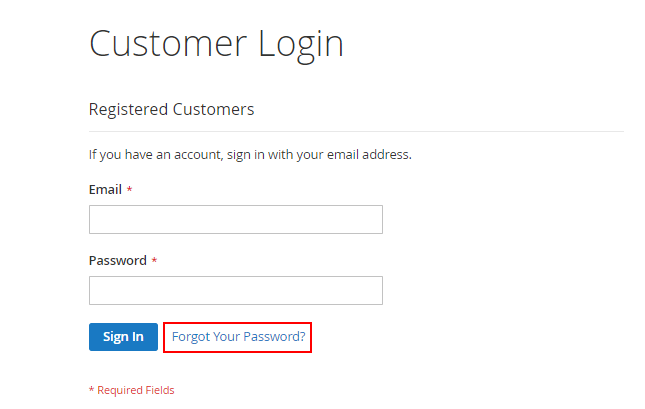
- If you completely forgot your password, on the Login page, choose Forgot Your Password?
- When Forgot Your Password field displays, enter the Email Address that is associated with your account and click Submit button.
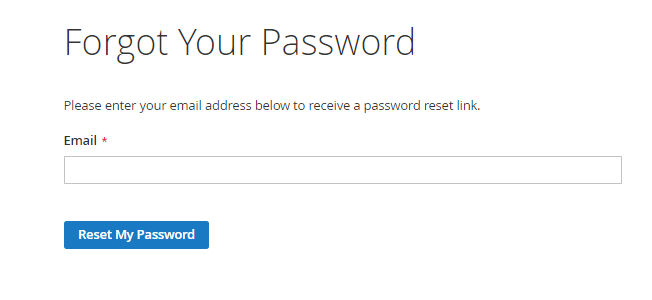
After that, a “Password Reset Confirmation” email with a link to reset your password will be sent to the email you have entered before if it matches the email which is associated with your account.
- Tap the link in the email you’ve received, when prompted, enter your New Password and confirm again, notice that the new password has to meet the requirement. When you are ready to reset your password, tap Reset Password button to finish.
In short, here are all the details to Sign In Your Account in Magento 2 we want to share with you. If you find it helpful for you, please Like, Share and Subscribe to keep updating for more upcoming blogs!