What Inside The Configuration of Magento 2

Every configuration setting in Magento Open Source is  listed as field descriptions in the online Configuration Reference. Read this article to learn how to apply configuration settings to specific store views: An useful information about Scope in Magento 2
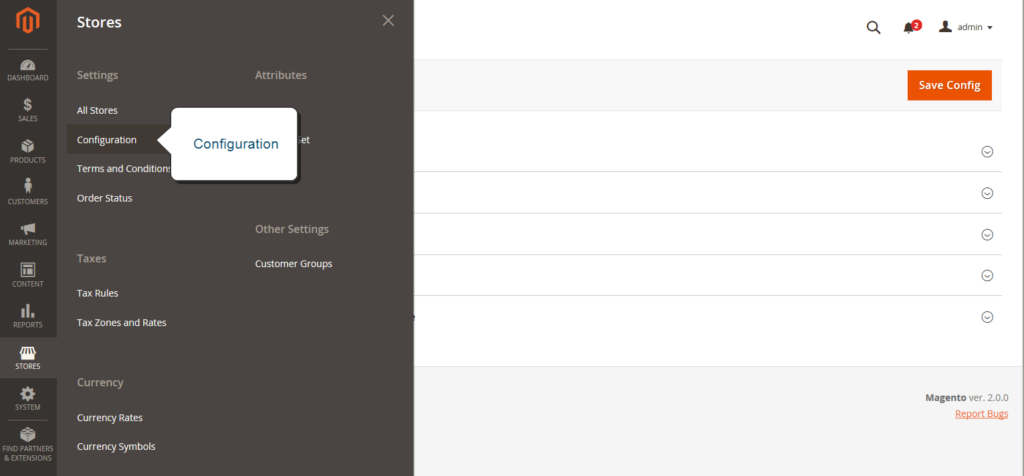
Configuration of Magento 2
Configuration

In this article, we will provide the Configuration Tabs in Magento 2 and how to open every single tab.

General:
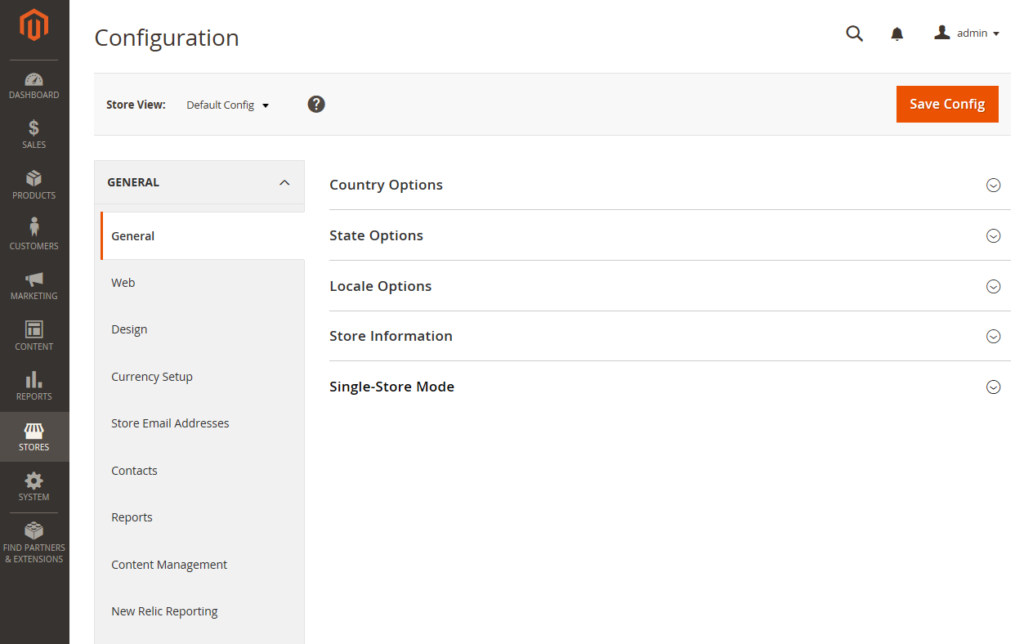
Stores > Settings > Configuration > General

This tab contains basic configuration settings for the store, URLs, theme, email addresses, store contacts, currency, editor, and dashboard reports. There are 9 options in this tab: General, Web, Design, Currency Setup, Store Email Addresses, Contacts, Reports, Content Management, New Relic Reporting.

Catalog:
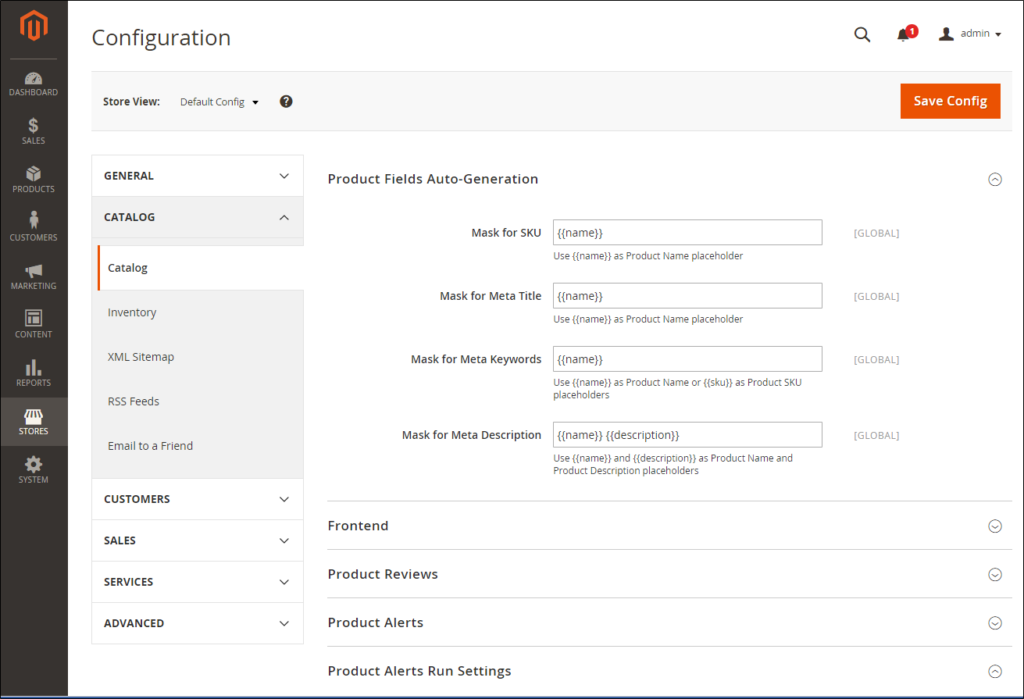
System > Configuration > Catalog

It controls product and inventory settings, controls sitemap and RSS feed generation, and indicates the email template that is used to share products information with friends. There are 5 options in this tab: Catalog, Inventory, XML Sitemap, RSS Feeds, Email to a Friend

Customers:
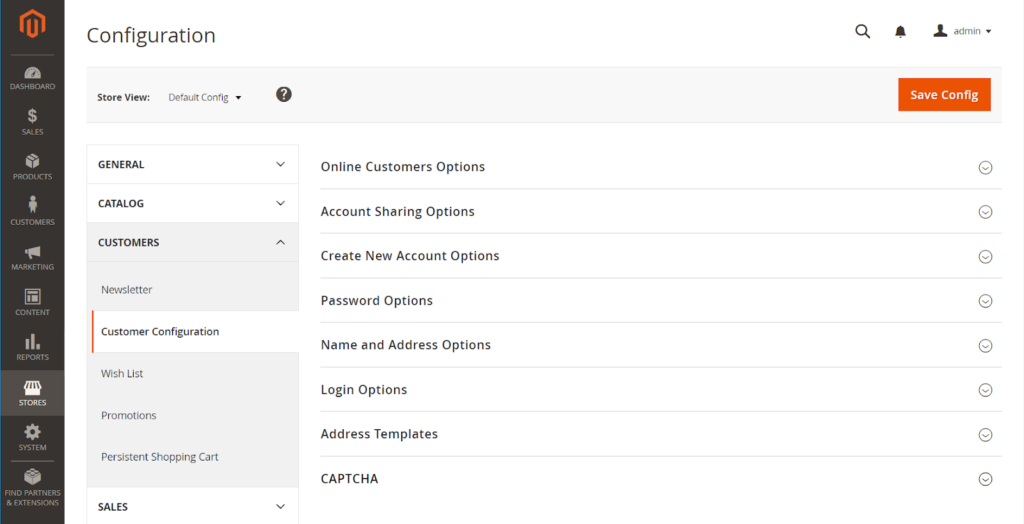
System > Configuration > Customers

It controls basic customer account and login options, newsletter settings, wish list, and the format of auto-generated coupon codes. There are 5 options in this tab: Newsletter, Customer Configuration, Wish List, Promotions, Persistent Shopping Cart.

Sales:
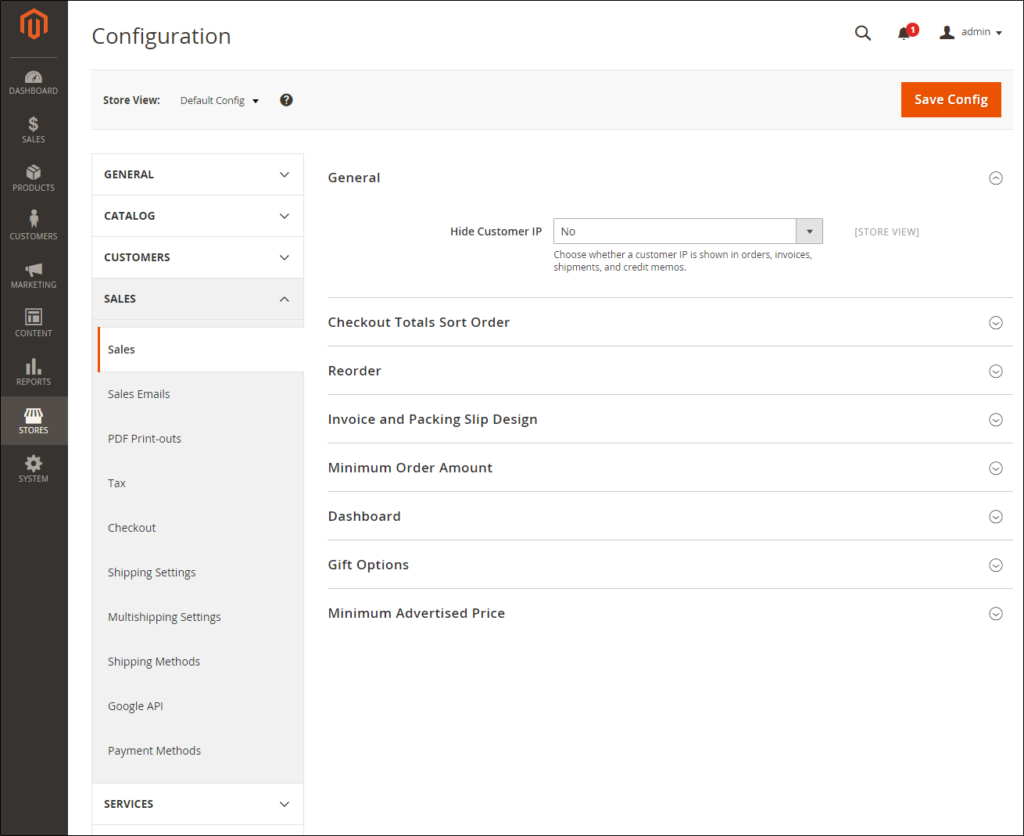
System > Configuration > Sales

It controls checkout and tax settings, payment and shipping options, sales email and PDF print-outs, and Google API settings. There are 10 options in this tab: Sales, Sales Emails, PDF Print-outs, Tax, Checkout, Shipping Settings, Multishipping Settings, Shipping Methods, Google API, Payment Methods.

Services:
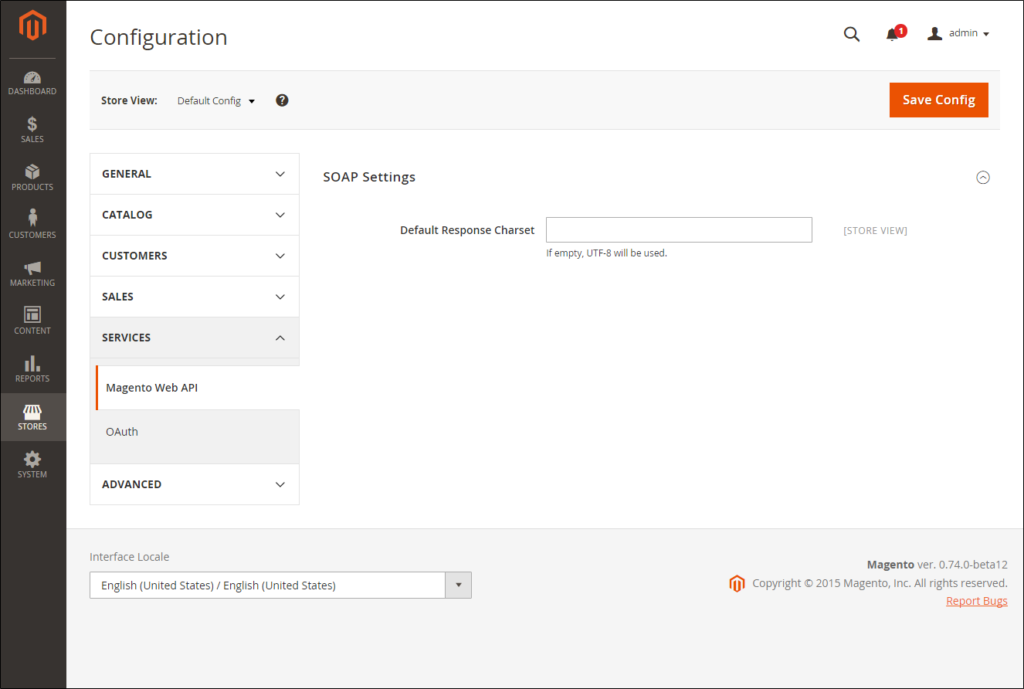
System > Configuration > Services

It configures Magento API settings, including SOAP and OAuth. There are 2 options in this tab: Magento Web API and OAuth.

Advanced

System > Configuration > Advanced

It controls default Admin settings, various system configuration settings, advanced module controls, and developer tools. There are 3 options in this tab: Admin, System, Developer.

Above is a full describe the configuration of Magento 2. If you have any question or want to edit the article, feel free to comment. See you in the next article: Inside Taxes of Magento 2.

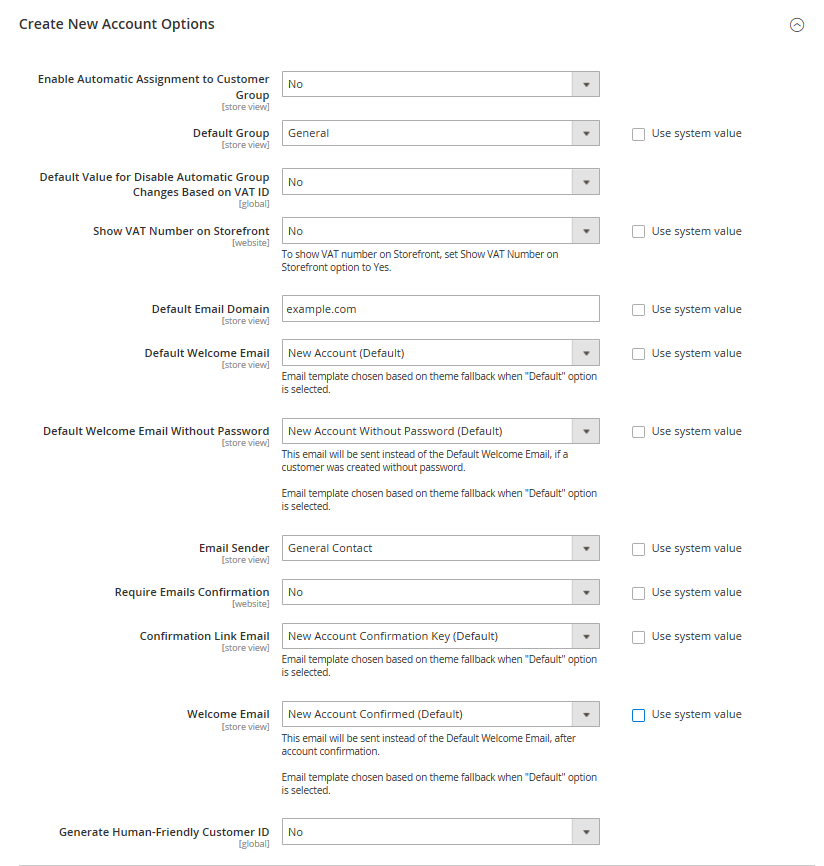
An Easy Way to Configure Customer Password Options in Magento 2

In Magento 2, when you request to reset password, there will be a email sent to you for your notification including the lifetime of the password recovery link. It requires your new password have to meets the compulsory level of security. And you know, all of them, email template, lifetime of the password revovery link and, level of security are able to configure in customer password options from the backend. Moreover, admin can give customers permission to change their own password or set to only store owners can do so.

To Configure Customer Password Options

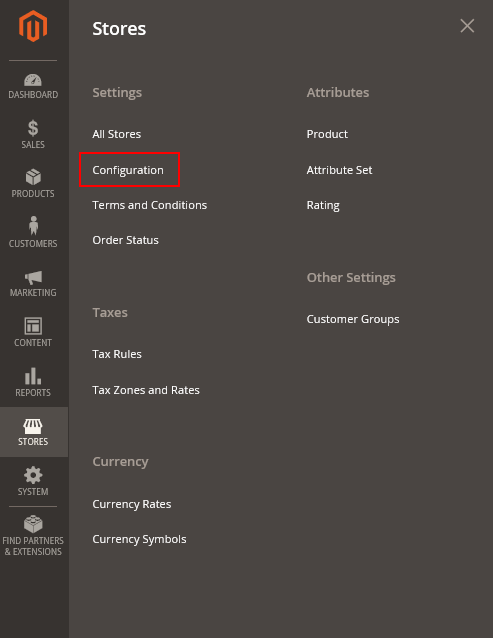
  1. Open the Admin homepage, then choose Stores on the sidebar. Next, under Settings, tap Configuration.
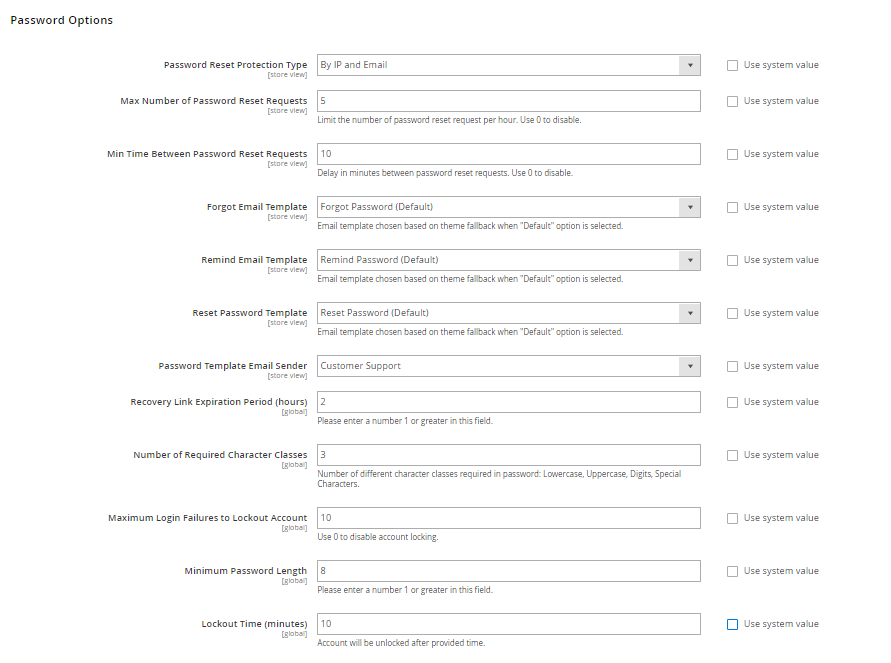
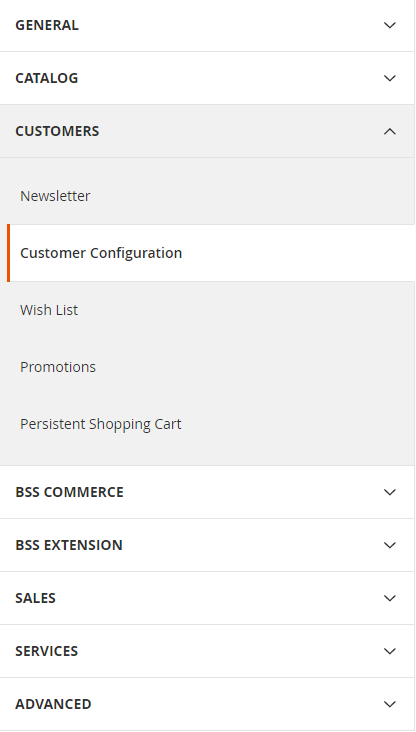
  2. In the board on the left, choose Customer Configuration under Customers. Next, expend the Password Options sector.
  3. Password Reset Protection Type field offers you 4 methods of managing password reset requests:
  • By IP and Email: The password can be reset online after receiving response about reset notification from Admin account.
  • By IP: The password can be rest online without any confirmation.
  • By Email: The password only can be reset after responding to an email notification sent form Admin account.
  • None: Only the admin can reset the password.
  1. In order to limit the number of reset password times per hour, do the following:

a. In Max Number of Password Reset Requests field, set the maximum number of password reset requests which is allowed to be sent per hour.

b. In Min Time Between Password Reset Requests field, set the minimum number of minutes which must transpire between requests.

  1. In order to configure the password reset email notification, do the following:

a. In Forgot Email Template, choose template used for the email sent to customers who have forgotten their passwords.

b. In Remind Email Template field, choose the template which is used when a password hint is sent to customers.

c. In Reset Password Template fieldchoose template used when customeres change their passwords.

d. In Password Template Email Sender field, set the store contact which appears as the sender of password-related notifications.

  1. To complete the password reset security options left

a. In Recovery Link Expiration Period (hours) field, set the number of hours for valid recovery link.

b. In Number of Required Charater Classes filed, set the number of differnet character types required for a password based on 4 character classes: Lowercase, Uppercase, Numeric, Special Characters.

c. In Maximum Login Failures to Lockout Account field, leave the number of failed login attempts until the Admin account is looked. If you want unlimited attempts, leave zero.

d. In Minimum Password Length field, leave the minimum number of characters which can be used in a password.

e. In Lockout Time (minutes) field, leave the number of minutes an Admin account is locked caused of too many failed attempts to log in.

  1. Tap Save Config to finish.

We have presented  a way to Configure Customer Password Options in Magento 2. We hope that this article can show you useful information to select the appropriate extension for your online shop. If you find it helpful for you, please Like, Share and Subscribe to keep updating for our next blogs!

How to Configure Cart Thumbnails in Magento 2

Cart Thumbnails are small images that appear in the cart when customers shopping online. These undersized pictures help to give online buyers an overview of the product they are about to spend money on. If a customer buys a simple product with specific color, then ideally, the Cart Thumbnails should match that product.
thumbnail-images

However, the thumbnails do not always show exactly what the product is (in terms of size, color, or length). In other words, it is impossible to display all the variations of a configurable or grouped product which have multiple options to choose. For these two types, Magento 2 allows admin to select the Cart Thumbnails images from either their “parent” products or from the product variation.

To configure Cart Thumbnails images for Configurable and Grouped products in the current store view, do the following:

  1. Firstly, sign in with your admin account. On the Admin sidebar, select Stores.
  2. Choose Configuration under Settings.
  3. Expand Sale on the left panel, then click Checkout.
  4. Click the drop-down icon in the Shopping Cart section. Now you can do the settings:
  • Grouped Product Image: Set it to “Parent Product Thumbnail” if you want the thumbnail image for grouped products to be selected from parent product. Set it to “Product Thumbnail Itself” otherwise.
  • Configurable Product Image: Select the “Parent Product Thumbnail” option if you want the thumbnail image for configurable products to be selected from parent product. Otherwise, select the “Product Thumbnail Itself” option.Configure Cart Thumbnails
  1. When you finish the settings, tap Save Config (on the upper-right corner of your working screen) to save changes.

You may need to refresh the caches by clicking the Cache Management link when the system note appears.system-note Cart Thumbnails

Now, go to your store’s backend and see what you can do with thumbnail images for your products to improve your customer’s shopping experience.

We have presented Cart Thumbnails in Magento 2. We hope that this article can show you useful information to select the appropriate extension for your online shop. Don’t forget to Like, Share, and Subscribe to Magestandard for more informative Magento extension review articles.


How to Activate Reorder in Magento 2

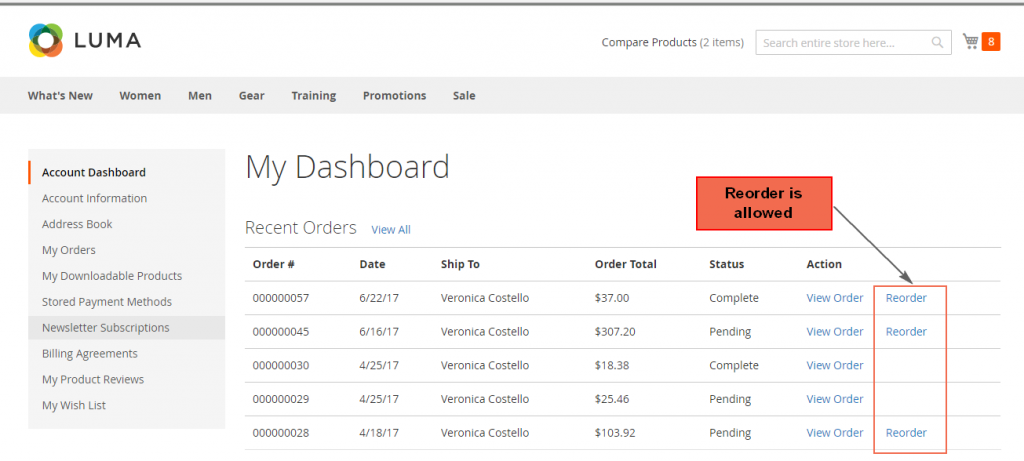
When discuss about supporting tools for Shopping Cart in online stores, it is Magento 2 that provides a lot of options for store owners to better manage their electronic sales. One of these is Reorder Option in Sales Configuration. If Reorder is enabled in the backend, registered buyers can edit their existing orders right in My dashboard section.reorder-in-frontend

To activate Reorder Option, follow the steps below:

  1. Log in the backend with an admin account. On the Admin sidebar, tap Stores.
  2. After that, click Configuration in the Settings section.
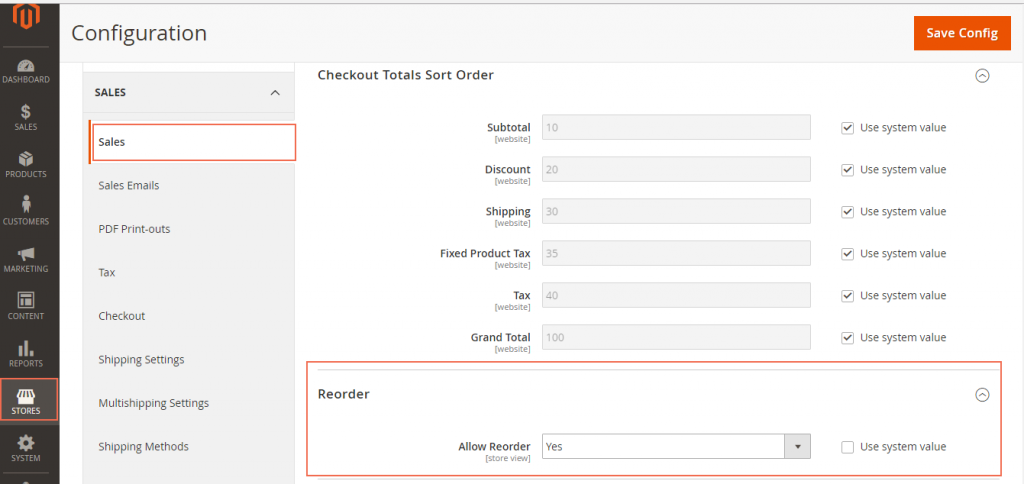
  3. On the left panel, expand the SALES row and select Sales then.
  4. Scroll down to the Reorder section. Set it to your preference:
  • “Yes”: Allow customers to reorder in My dashboard section.
  • “No”: Reorder is not allowed. Because Magento 2 set the field to “Yes” as default, you should clear the Use System Value checkbox before choosing this option.configure-reorder
  1. Lastly, tap Save Config on the upper-right corner to confirm your settings. You may need to reindex the data and refresh the cache by clicking the Cache Management link when the system note appears.refresh-cache-management

Once Reorder is enabled, it is not only buyers can edit their orders but also admins can do it from the backend. To reorder for an existing order in the backend, do the following:

  1. On the Admin sidebar, click Customers. Next, select All customer.
  2. You can either use the filter to search for a specific customer (search by name, or email, or tax code,…) or enter the keyword(s) to the search box on the upper left corner. You might need to refresh the filter to clear all the previous filters before adding a new one.
  3. After finding the customer, click edit in the Action column.
  4. On the left panel, tap Orders under Customer Information. Here you can see all the orders that the selected customer has placed. Click Reorder Option in the last column of the order that you want to edit.
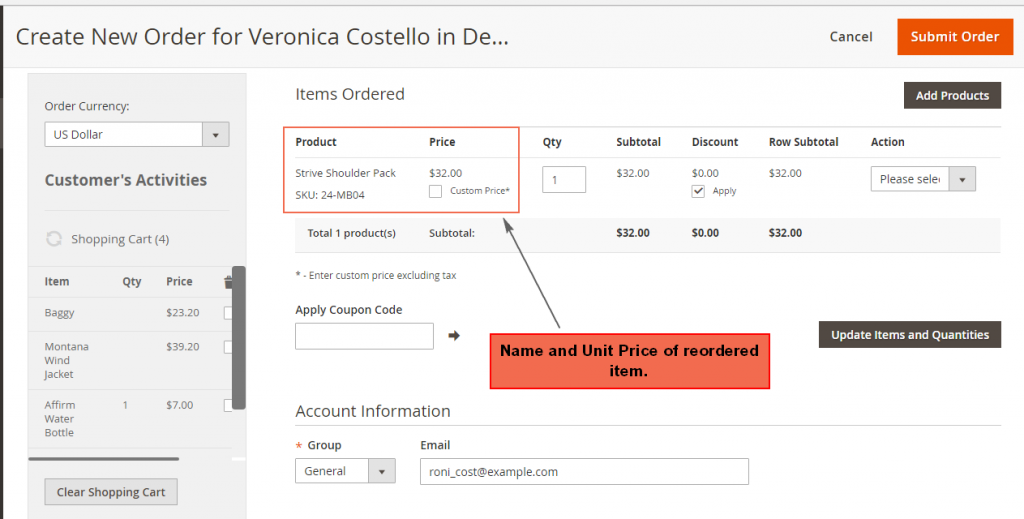
  5. Next, edit the order to your preferences.reorder-in-backend Reorder Option
  6. Tap Submit Order to save the changes. 

That is all about Reorder Option in Magento 2. We hope you enjoy the information and don’t forget to follow us to receive more knowledge about Magento 2.