How to Configure Default Field Values in Magento 2

When creating new products for stores using Magento 2 platform, Product Workspace allows you to save time by providing a number of default field values. These values are referenced from some other fields such as product name, or product description. Magento 2 set the following fields automatically to default values:

  • SKU: Based on Product Name field.
  • Meta Title: Based on Product Name field.
  • Meta Keywords: Based on Product Name field.
  • Meta Description: Based on both Product Name and Product Description fields.

The text that is put in double-curly braces are placeholders and it refers to the value of the base field(s) (Product Name, for example). Any attribute code included in the product attribute set can also be used as a placeholder.

Admin can edit the value of placeholders by the following steps:

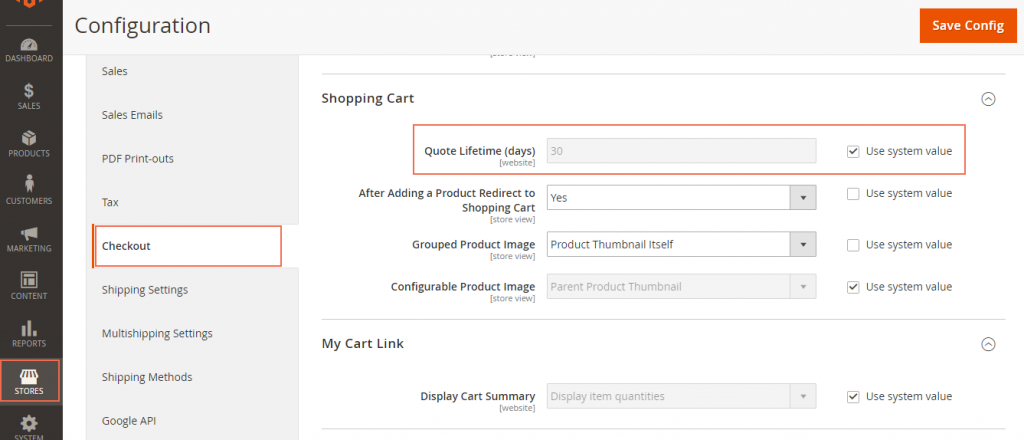
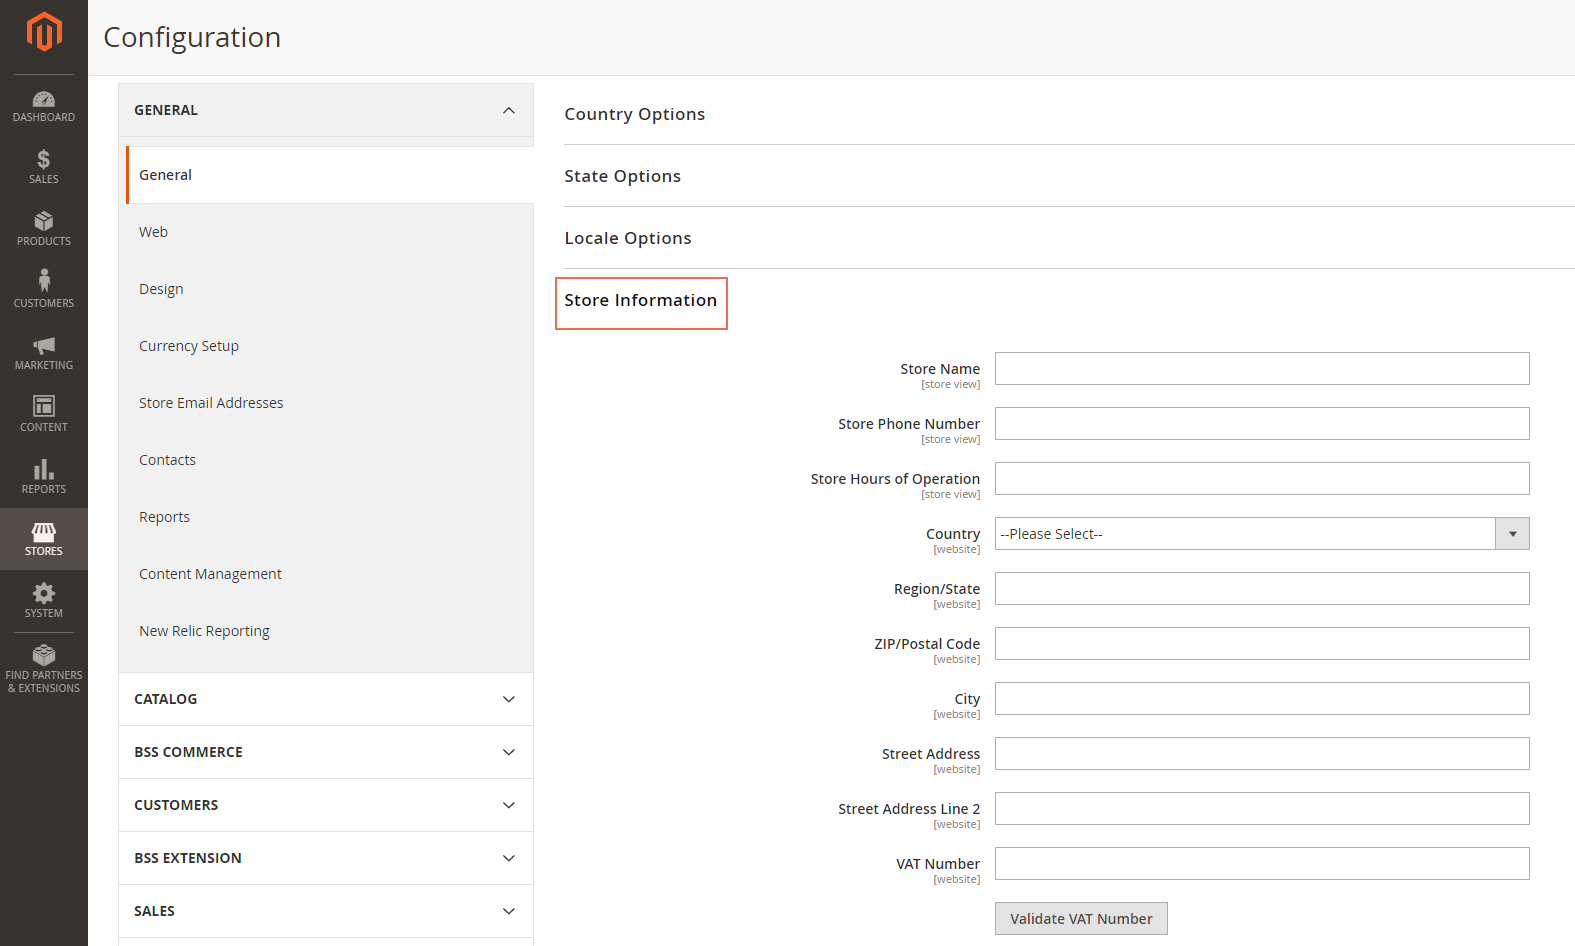
Step 1: In the backend mode, go to Admin Sidebar and click Stores.

Step 2: Next, select Configuration under Settings.

Step 3: Expand Catalog on the left panel then choose Catalog.

Step 4: Drop down the Product Fields Auto-Generation section. After that, enter the text that you want to replace the placeholder values. Remember to unmark the Use System Value checkboxes before filling the blanks.Default Field Values

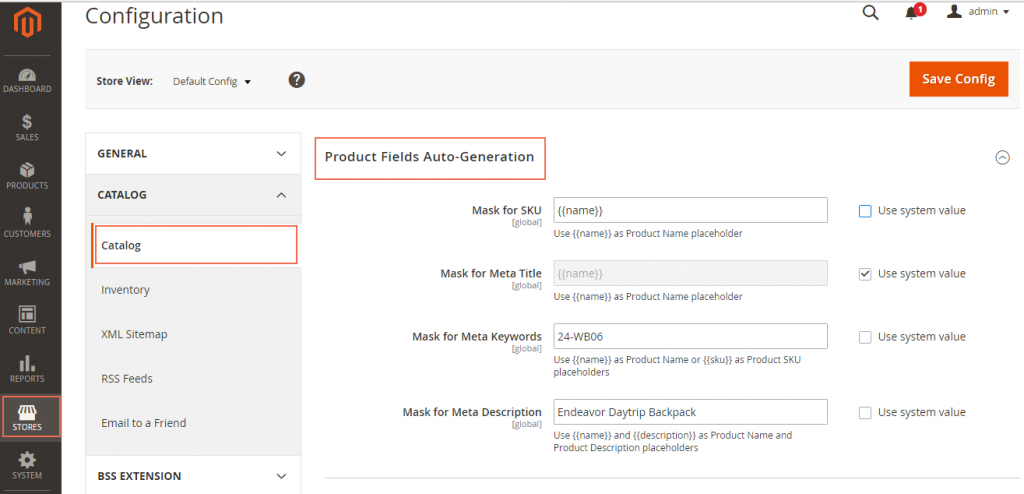
For instance, you want to enclose the word “Magento 2” to the meta descriptions of all products, you just need to enter “Magento 2” in the Mask for Meta Description field. By doing this, the phrase “Magento 2” will be shown up to all of the descriptions.

Step 5: Click Save config on the upper-right corner to confirm your settings.

Below is a list of common placeholders used by many admin:

{{color}}

{{country_of_manufacture}}

{{description}}

{{gender}}

{{material}}

{{name}}

{{short_description}}

{{size}}

{{sku}}

Now you can log in the backend mode and try out setting new values for some placeholders.

In short, here are all the details about Configuring Default Field Values in Magento 2 we want to share with you. For the Magento developers, it’s our pleasure to receive your comment and recommendation on our FAQ extension list. If you want to add or erase any item in this FAQ list, feel free to contact us. Don’t forget to Like, Share, and Subscribe to Magestandard for more informative Magento extension review articles.

Quote Lifetime for Your Product Price in Magento 2

It is common that the Product Price can vary relatively after a period of time. For example, it may cost more money to buy a swimsuit in summer than it does in winter, because of higher demand. Therefore, online store owners need to set a fixed number of days (or months) for an item’s price. How long a price is valid can be set by using Quote Lifetime setting in Magento 2.

To use Quote Lifetime in Magento 2, do as the following:

  1. Go to the backend mode, click Stores on the Admin sidebar.
  2. Choose Configuration under Settings.
  3. On the left panel, expand Sales row. Click Check out after that.
  4. Next, scroll down to the Shopping cart section. Set the Quote Lifetime as your preference.
  • The unit used here is days. Magento 2 set it to 30 as default.
  • You may need to clear the Use System Value checkbox before setting to a new period of time that your quote price is valid.
  1. When you finish, click Save Config to save the change.

    Configure Quote Lifetime
    Configure Quote Lifetime

Now, let’s look at some more details about the example about swimsuit above. You may think that because July is the hottest month in the summer, the demand for swimming is extremely high, so that you want to raise the price a bit higher (about $20 per item) for this month. After 30 days, you may reset the price to adjust to the changing demand.

In order to set a lifetime of 30 days for the new price, you need to follow the steps above.

  • In the Quote Lifetime field, enter 30 to the box.
  • Or you can just mark the Use System Value checkbox to take the default number.
  • Lastly, save your change and go to your homepage to test the setting.

In short, here are all the details and reviews of Quote Lifetime for Product Price in Magento 2 we want to share with you. For the Magento developers, it’s our pleasure to receive your comment and recommendation on our FAQ extension list. If you want to add or erase any item in this FAQ list, feel free to contact us. Don’t forget to Like, Share, and Subscribe to Magestandard for more informative Magento extension review articles.

How to Set Up A Fflat Catalog Flat Catalog in Magento 2

Catalog data in Magento 2 is often stored in numerous rows and columns, supported by the Entity-Attribute-Value (EAV) model. As product attributes are put in multiple tables, SQL queries are sometimes long and complicated to use. Fortunately, Magento 2 does provide setup tool to cope with that problem. It is called Flat Catalog.

A flat catalog helps admin to create brand new tables in a very short time. All the necessary information about a product or category are included in the table’s rows, which is very convenient for users. Moreover, a flat catalog can also be updated automatically: either in every minute or at a time that synchronized to your Cron schedule.

To Set Up A Fflat Catalog for Your Online Store:

  1. Go to the backend gate, press Stores on the left panel.
  2. Choose Configuration under Settings.
  3. Click on the dropdown icon of Catalog, select Catalog after that.
  4. Expand the Storefront element, pay attention to Use Flat Catalog Category and Use Flat Catalog Product sections. Clear the Use system value checkbox (if necessary) and set “Yes” for the section that you want to apply flat catalog.Flat-Catalog-Configuration
  5. Once finished, tap Save config to save the changes.
  6. An additional step is needed to be conducted to refresh the cache: Click on the Cache Management link and follow the guided steps to update the moderation.

Verify the actions in Flat Catalog

Having enabled the flat catalog, you may want to test whether it works in your online store. Do the following steps to verify the action:

For a single product in Flat Catalog

  1. In the backend mode, tap Products on the Admin sidebar.
  2. Under Inventories click Products.
  3. Go to edit option of an arbitrary product, retype its name by adding “_TEST” to its origin in the Product Name field.
  4. Press Save.
  5. Now go to the homepage of your store and search for the product that you’ve changed. Or you can navigate to the edited product by category it belongs to. The results will show up as bellow:Storefront-with-Flat-Catalog

For a category:

  1. Sign in with an admin account. On the Admin sidebar, click Products, then tap Categories under Inventory.
  2. Make sure that the Store View field is set to “All store view”. Now press Add Subcategory button.
  3. Fill “TEST Subcategory” to the Category Name field, then tap Save config.
  4. The next step is to add products to your new category. Expand the Products in Categories sector, click Reset filter to refresh your products list. Add some of the products to the testing category by marking the checkbox on the left side of each item.Test-Subcategory
  5. Click Save to confirm the actions.
  6. Next, go to your homepage to browse to the new category that you created. The change will appear soon.

Reset to the default setting

You’ve learned how to enable flat catalog for your online store in Magento 2. Now, if you want to reset to the default setting, consider the following guide:

Modify the tested product to its original form:

  1. On the Admin sidebar, click Products.
  2. Select Catalog below Inventory.
  3. Look at the edited product. Click “edit” option under the Action column. Remove “_TEST” from its name.
  4. Click Save to confirm the change.

Remove the subcategory added:

  1. On the Admin sidebar, choose Products.
  2. Pick up Categories under Inventory.
  3. Find the new category that you created on the left side, then click it.
  4. Press the delete button on the upper-right corner. There will be a System Notice box to ask for your decision to delete the category. Choose OK for that.

    System-Notice-box-Fflat-Catalog
    System Notice Box Fflat Catalog
  5. When complete, tap Save.

Restore the original catalog setting:

  1. In the backend mode, select Stores in the Admin sidebar.
  2. Go to Configuration under Settings
  3. Expand Catalog sector, then click on Catalog element.
  4. In Storefront field, mark the Use system value checkbox for  Use Flat Catalog Category. For Use Flat Catalog Product section, set “No”.
  5. Tap Save Config to verify your modification.
  6. Refresh the system cache through Cache Management link.

You’ve already had a full understanding about Flat Catalog in Magento 2. Now go to your online store and see what you can do with the new information.

A Helpful Guide to Basic Configuration in Magento 2

Mastering the basic configuration is a must-have thing for any store owner. This blog will guide you through the basic setting in Magento 2 admin panel. To be more specifically, there are five main sections that will be introduced in this article, including store admin, store details, storefront branding, website – store – view and industry compliance.

1.Store Admin in Basic Configuration


The store admin is your back office that you can conduct all the actions here, from creating product, managing order, setting promotion to configuring tax and checking customer data. All the administrative tasks are executed in store admin.

The store admin is protected by a password that is set up when you install Magento 2. In case you forget the password, you can request a temporary password sent by the system to the email you use when creating your account.

2. Store Details in Basic Configuration

Please navigate to Admin => Sidebar => Stores => Configuration => General => Store Information.

magento-2-store-details-in-basic-configuration
Magento 2 store details

This part allows admin to enter detailed information about your store, including store name, store phone number, store hours of operation, country, region, postal code, city, street address, and VAT number.

The store’s detailed information such as name, address, email and phone number will be included in your document like invoice and email sent to customers.

3. Storefront Branding in Basic Configuration

magento-2-storefront-branding-in-basic-configuration
Magento 2 storefront branding

When first setting up for your frontend store, here are a few quick thing you can do: add logo in the header, use the favicon for the browser, a demo notice on the header such as “This is a demo store. Any orders placed through this store will not be honored or fulfilled” and a copyright note on the footer of the page.

4. Websites, Stores, and Views

During Magento 2 installation, admin can create multiple websites, each website can have multiple stores and each store can hold multiple store views. Admin is capable of managing all websites, stores and store views from admin panel.

5. Industry Compliance

It is merchant’s responsibility to oblige the legal requirements, industry guidelines and best practices which are set by law, payment card industry and depended on the location.

In short, here is all the details for Magento 2 Basic Configuration we want to share with you. If you find it helpful for you, please Like, Share and Subscribe to keep updating for more upcoming blogs!