When you log in the Admin account, you sometimes receives messages from Magento on a regular basis. In this article, you will have an introduction of Message Inbox in Magento 2.

What is Message Inbox?
The bell icon in the header displays notifications of unread messages in your box. The content of messages includes patches, new releases, system update and forthcoming events.
Regarding messages of critical importance, they keep appearing in a pop-up window whenever you sign into your account. These notifications disappear only when you mark them as read or remove them.
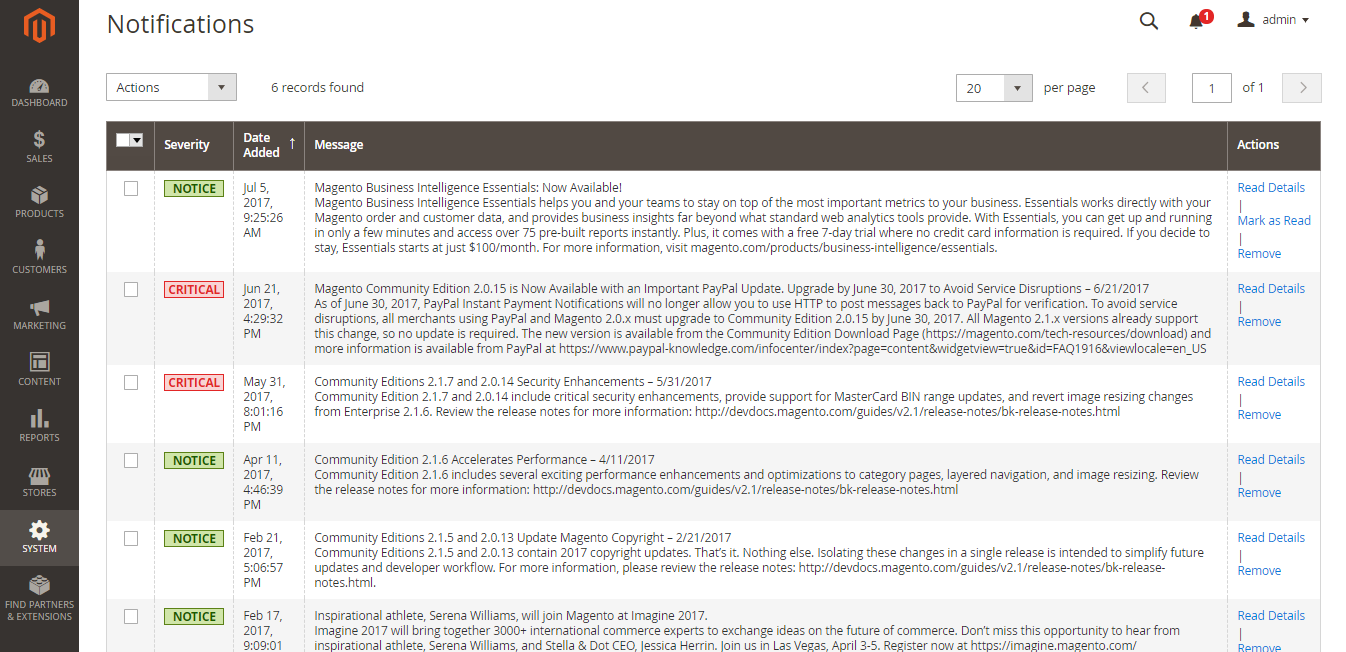
With the notice grid lists, you can see all messages and carry out actions such as viewing detailed information, marking messages as read and deleting them from the inbox. Moreover, notifications are rated by severity and shown with the most recent at the top.

Explore Incoming Messages
- Click the bell icon in the header then read the summing-up and do any of these options:
- Tap the message to view full content if needed
- Choose the delete icon on the right of the message to remove the messsage
- Select See All to show the Notifications grid
- In terms of urgently important messages, do one of the following:
- Tap Read Details
- Click Close to remove the popup but keep the message active
See All Notifications
- Do one of two choices:
- Click the Notification icon in the header -> Choose See All in the footer of the summary
- Select System on the Admin Sidebar -> Tap Notifications under Other Settings
- Do one of the following in the Action column
- Click Read Details to view more information (a new window including the linked page exists)
- Choose Mark As Read to hold the message in your inbox
- Use Remove tab to erase the message
- If you want to apply an action to many message, choose one of two options:
- Mark the checkbox of each message you need in the first column
- Set the Mass Actions control to choose multiple messages
- To set the Actions control, do any of the following:
- Mark as Read
- Remove
- Click Submit to finish the process
Configure Notices
- Choose Stores on the Admin Sidebar -> Select Configuration under Settings
- Tap System under Advanced in the left panel
- Widen the Notifications part and do these steps:
- Apply Yes to Use HTTPS to Get Feed if your store Admin runs over a secure URL
- Set Update Frequency to choose how often your inbox is updated and the interval can be from one to twenty-four hours
- Select Save Config to complete
We have presented about Message Inbox in Magento 2. We hope that you have had the details about message inbox in Magento 2. If you need any help, please feel free to contact us.


