How to Manage Your Customers’ Shopping Cart through Cart Configuration in Magento 2?

Having customers to place orders on online products is always a huge success for any e-commerce businessman. But managing those worthy  orders requires a lot of efforts. Admin of online stores need to be professional in Cart Configuration so as to handle the job effectively. If you barely know about Cart Configuration and Cart Link, this article would be a cure for you.

Cart Configuration

Cart Configuration provides you many tools to efficaciously manage your shopping cart. It includes seven instruments, which are:

  • Card Link
  • Cart Sidebar
  • Redirect to Cart
  • Quote Lifetime
  • Minimum Order Amount
  • Reorder
  • Cart Thumbnails

You can find all of these tools in the backend of Magento platform, using an admin account: Stores -> Configuration -> Sales. Minimum Order Amount and Reorder options can be easily found by choosing Sales on the dropdown list. The other fives stay in Checkout option.

Cart Link

In frontend of Magento platform, Cart Link lies on the upper-right of the online store, as you can see in the picture below. It indicates the number of items/products a customer has ordered. If the Shopping Cart Sidebar is in “enable” status(this is set by the store admin), customers can have more detail information about their shopping activities by click on the cart icon. There, they can see all the items being purchased, cart subtotal price, and others.

Cart Link in Frontend Cart Configuration
Cart Link in Frontend

In the backend gate, admin can configure the cart link by the following five steps:

Step1: Choose backend gate, sign in with your admin account.

Step 2: Choose STORES, then under Settings click Configuration.

Step 3: On the navigation column on the left, expand Sales section.

Step 4: Pick up Check out choice

Open-Cart-Link

Step 5: Choose one of three options in My Cart Link sidebar:

  • Use system value
  • Display number of items in cart
  • Display items quantities

In order to select the last two ones, you need to check off the checkbox for Use system value option first.

My-Cart-Link

Click Save Configuration to confirm changes you have made.

Now you can easily manage your customers’ shopping Cart Configuration with the knowledge you’ve just study. For the Magento developers, it’s our pleasure to receive your comment and recommendation on our FAQ extension list. If you want to add or erase any item in this FAQ list, feel free to contact us. Don’t forget to Like, Share, and Subscribe to Magestandard for more informative  extension review articles.

What Is The Link between Redirect to Cart in Magento 2 and Conversion Rate?

A high conversion rate (the percentage of visitors converted into buyers) is always an important goal of every store owner. But how to improve the number is not easy at all. Fortunately, Magento 2 provide you a tool to deal with this tough task called Redirect to Cart. You can manage when the shopping cart appears: automatically after each time your customer adds an item or only when buyers want to check out. The decision will have a significant effect on your store’s conversion rate.

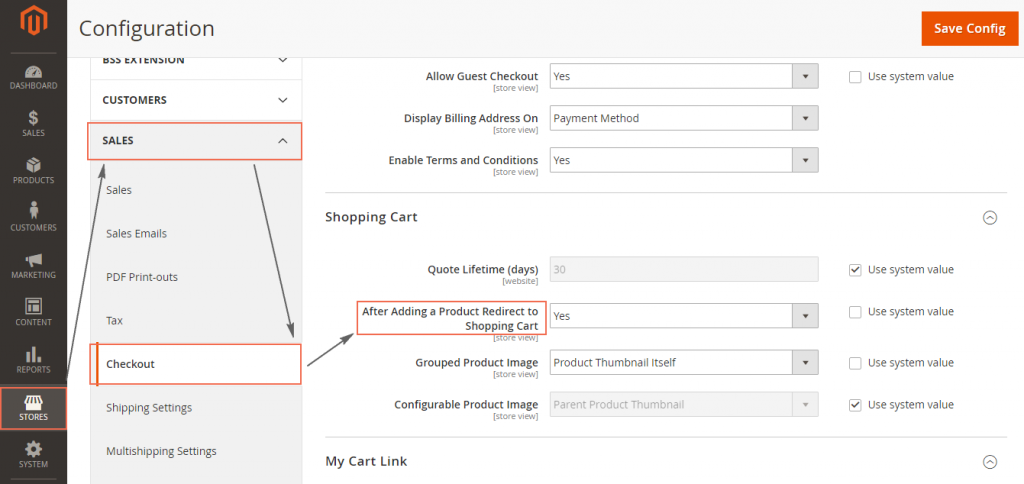
To configure Redirect to Cart, you need to go to backend mode first. After that, take the following steps:

  1. On the left sidebar, tap Stores.
  2. Drop down Sales to see its full elements. Then select Checkout.
  3. Expand the Shopping Cart factor,
  4. Here you will see After Adding a Product Redirect to Shopping Cart. You have three options to choose:
  • Use system value: The cart will follow the system set automatically.
  • Yes option: The Shopping Cart page will appear right after an items is added. This might discourage customers from continuing their shopping which results in negative impact on conversion rate.
  • No option: No redirect action is performed once this option is set. In other words, the Shopping Cart page will be shown only when customers click on Go to Checkout button.

Configure Redirect to Cart

  1. Click Save Configuration to save your setting.

We have presented about The Link between Redirect to Cart in Magento 2 and Conversion Rate. We hope that this article can show you useful information to select the appropriate extension for your online shop. For the Magento developers, it’s our pleasure to receive your comment and recommendation on our FAQ extension list. If you want to add or erase any item in this FAQ list, feel free to contact us. Don’t forget to Like, Share, and Subscribe to Magestandard for more informative  extension review articles.

How to Set Up A Fflat Catalog Flat Catalog in Magento 2

Catalog data in Magento 2 is often stored in numerous rows and columns, supported by the Entity-Attribute-Value (EAV) model. As product attributes are put in multiple tables, SQL queries are sometimes long and complicated to use. Fortunately, Magento 2 does provide setup tool to cope with that problem. It is called Flat Catalog.

A flat catalog helps admin to create brand new tables in a very short time. All the necessary information about a product or category are included in the table’s rows, which is very convenient for users. Moreover, a flat catalog can also be updated automatically: either in every minute or at a time that synchronized to your Cron schedule.

To Set Up A Fflat Catalog for Your Online Store:

  1. Go to the backend gate, press Stores on the left panel.
  2. Choose Configuration under Settings.
  3. Click on the dropdown icon of Catalog, select Catalog after that.
  4. Expand the Storefront element, pay attention to Use Flat Catalog Category and Use Flat Catalog Product sections. Clear the Use system value checkbox (if necessary) and set “Yes” for the section that you want to apply flat catalog.Flat-Catalog-Configuration
  5. Once finished, tap Save config to save the changes.
  6. An additional step is needed to be conducted to refresh the cache: Click on the Cache Management link and follow the guided steps to update the moderation.

Verify the actions in Flat Catalog

Having enabled the flat catalog, you may want to test whether it works in your online store. Do the following steps to verify the action:

For a single product in Flat Catalog

  1. In the backend mode, tap Products on the Admin sidebar.
  2. Under Inventories click Products.
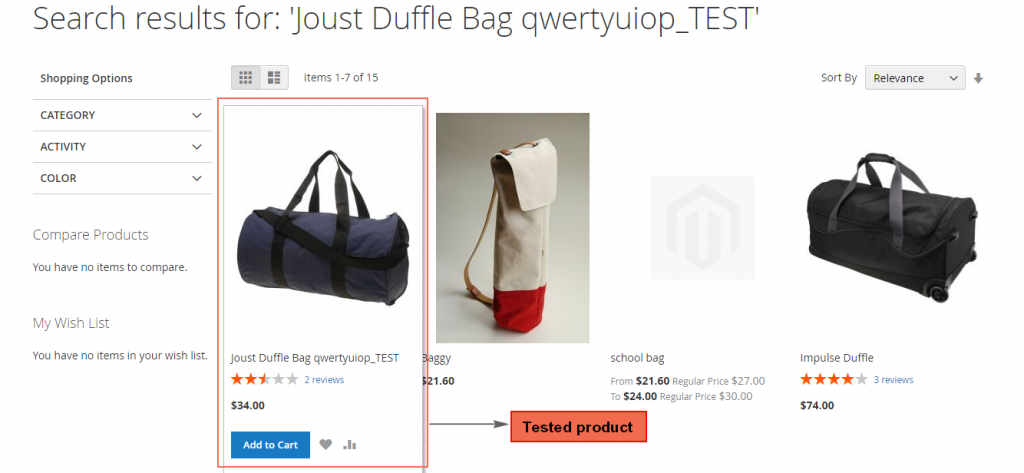
  3. Go to edit option of an arbitrary product, retype its name by adding “_TEST” to its origin in the Product Name field.
  4. Press Save.
  5. Now go to the homepage of your store and search for the product that you’ve changed. Or you can navigate to the edited product by category it belongs to. The results will show up as bellow:Storefront-with-Flat-Catalog

For a category:

  1. Sign in with an admin account. On the Admin sidebar, click Products, then tap Categories under Inventory.
  2. Make sure that the Store View field is set to “All store view”. Now press Add Subcategory button.
  3. Fill “TEST Subcategory” to the Category Name field, then tap Save config.
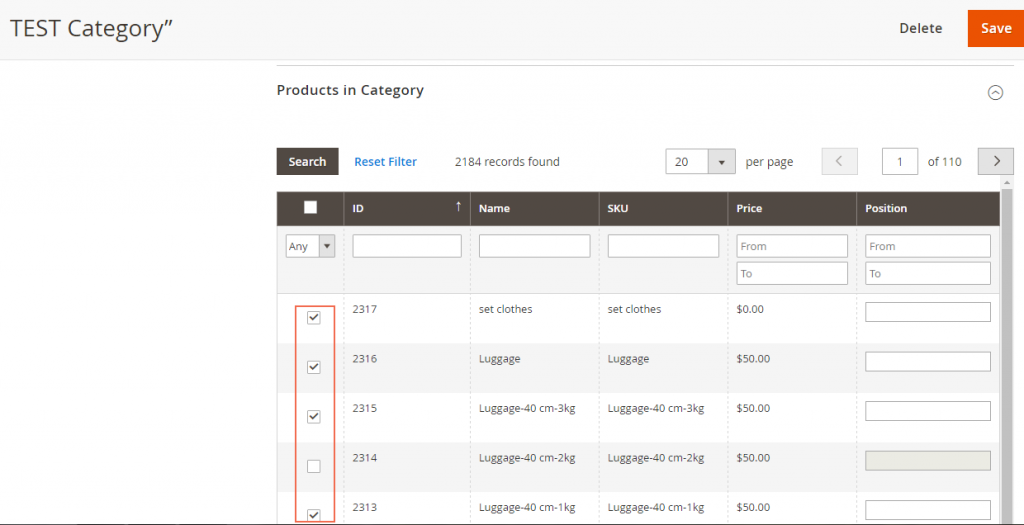
  4. The next step is to add products to your new category. Expand the Products in Categories sector, click Reset filter to refresh your products list. Add some of the products to the testing category by marking the checkbox on the left side of each item.Test-Subcategory
  5. Click Save to confirm the actions.
  6. Next, go to your homepage to browse to the new category that you created. The change will appear soon.

Reset to the default setting

You’ve learned how to enable flat catalog for your online store in Magento 2. Now, if you want to reset to the default setting, consider the following guide:

Modify the tested product to its original form:

  1. On the Admin sidebar, click Products.
  2. Select Catalog below Inventory.
  3. Look at the edited product. Click “edit” option under the Action column. Remove “_TEST” from its name.
  4. Click Save to confirm the change.

Remove the subcategory added:

  1. On the Admin sidebar, choose Products.
  2. Pick up Categories under Inventory.
  3. Find the new category that you created on the left side, then click it.
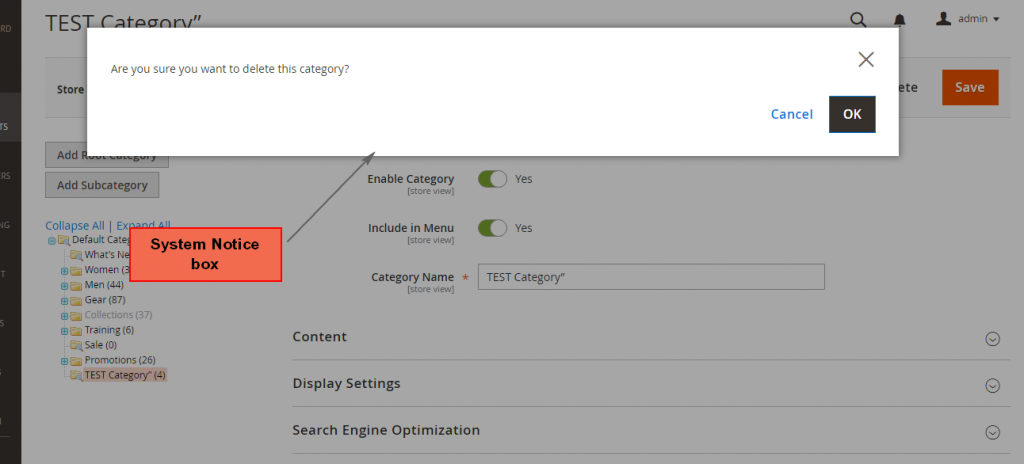
  4. Press the delete button on the upper-right corner. There will be a System Notice box to ask for your decision to delete the category. Choose OK for that.

    System-Notice-box-Fflat-Catalog
    System Notice Box Fflat Catalog
  5. When complete, tap Save.

Restore the original catalog setting:

  1. In the backend mode, select Stores in the Admin sidebar.
  2. Go to Configuration under Settings
  3. Expand Catalog sector, then click on Catalog element.
  4. In Storefront field, mark the Use system value checkbox for  Use Flat Catalog Category. For Use Flat Catalog Product section, set “No”.
  5. Tap Save Config to verify your modification.
  6. Refresh the system cache through Cache Management link.

You’ve already had a full understanding about Flat Catalog in Magento 2. Now go to your online store and see what you can do with the new information.

10 Things about Admin Sidebar in Magento 2

The sidebar is designed for both desktop and mobile devices for the purpose of navigating and managing the store. In this paper, we will take a closer look at components of Admin Sidebar in Magento 2.

The Admin sidebar is located on the left of the page and known as the main menu of your store’s admin. This flyout menu helps you control and operate your store effectively on a daily basis.

1. Dashboard

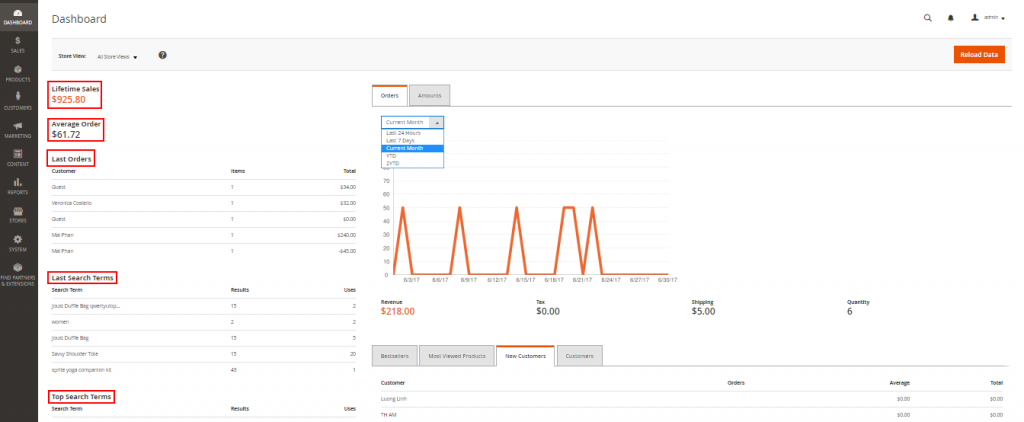
When you sign in to the Admin, the first page you can see is the dashboard giving the overall view of sale and customer activity. The dashboard is the default first page for the admin but you can also alter the configuration to present another page when logging in.

dashboard-admin-sidebar

2. Sales

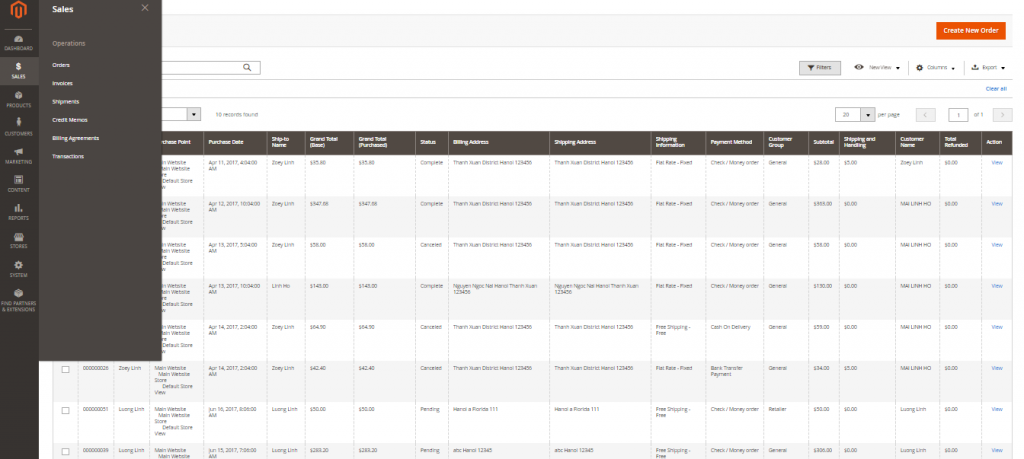
In Sales menu, there are selections as different steps in the cycle of an order consisting of orders, invoices, shipments, credit memos, billing agreements and transactions so that the admin can manage them at any time.

sales-admin-sidebar

3. Products

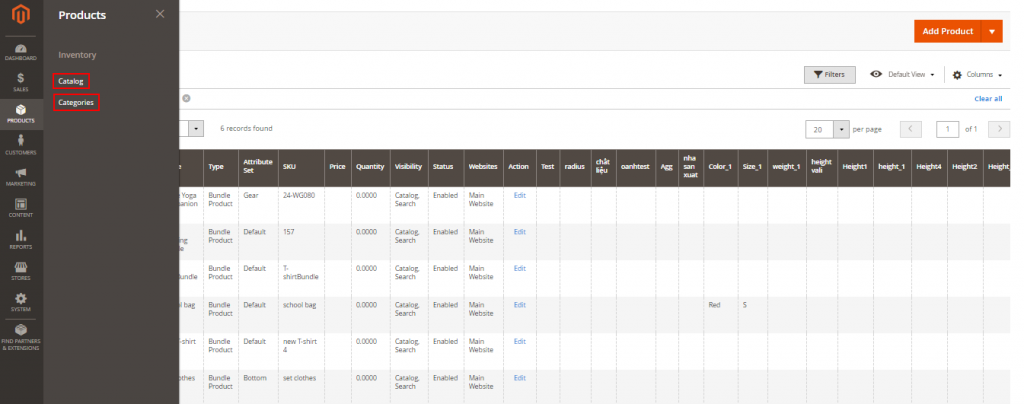
The Products menu supports admin in product creation, category and inventory management along with tools to control the content of catalog.

product-admin-sidebar

4. Customers

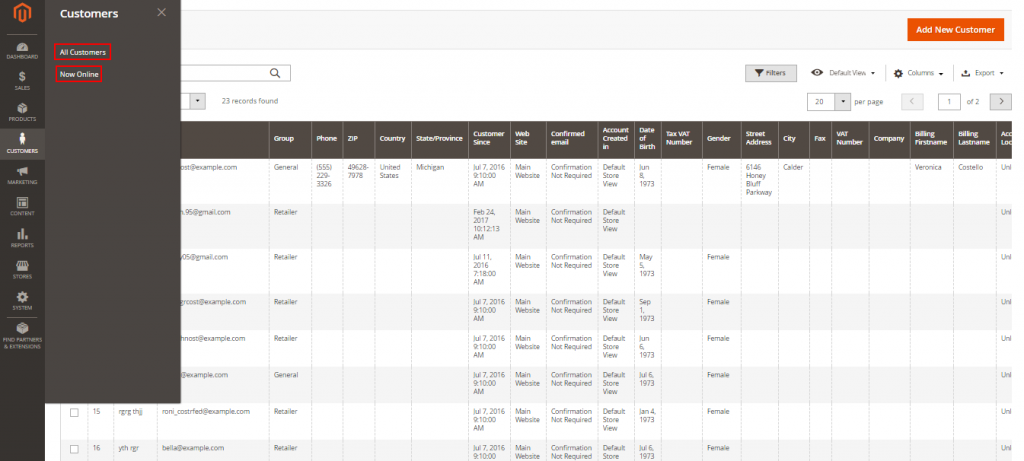
You can manage customer accounts and view who is currently online in your store with the Customers menu. Choosing All Customers if you want to have detail information about clients or selecting Now Online if you need to know customers who are online.  

customer-admin-sidebar

5. Marketing

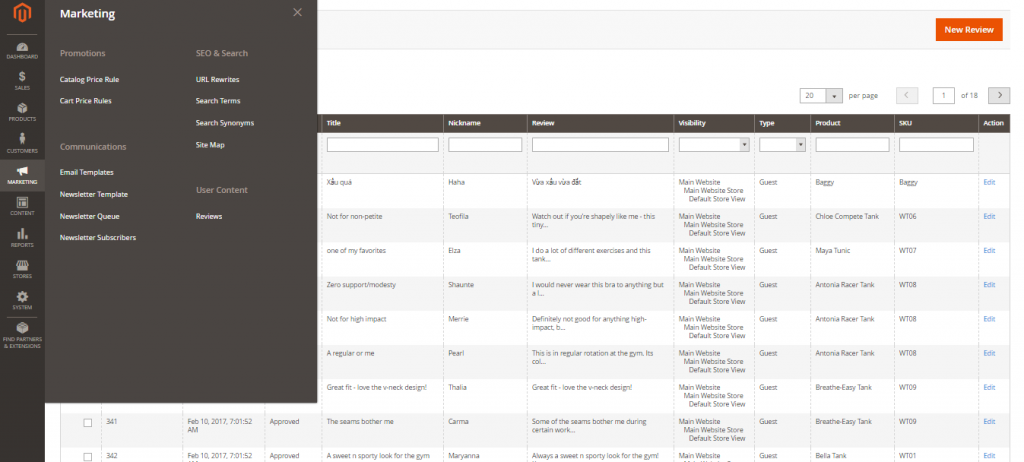
The Marketing menu allows you to manage markerting tools including promotions, communications, SEO & search or user content.

marketing-admin-sidebar

6. Content

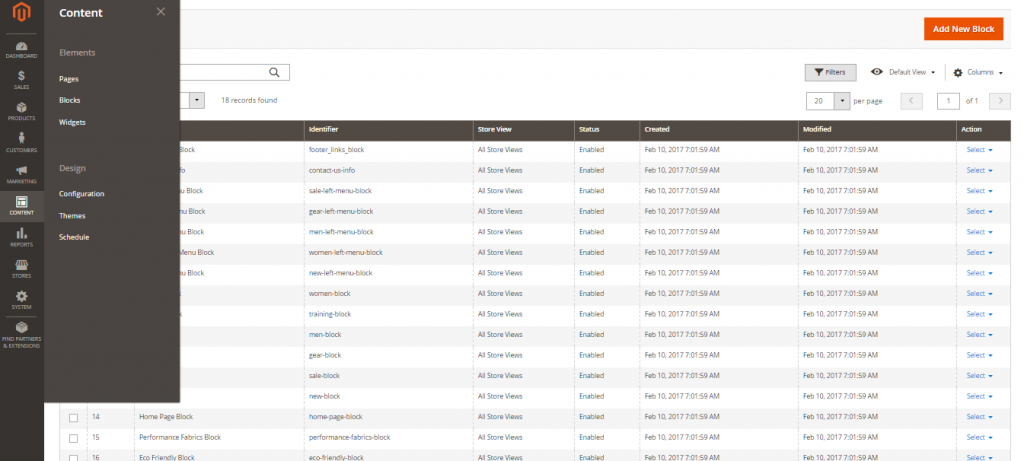
With the Content menu, you can manage the content elements and design of the store. It consists of creating pages, blocks and frontend apps or controlling your store display.

content-admin-sidebar

7. Reports

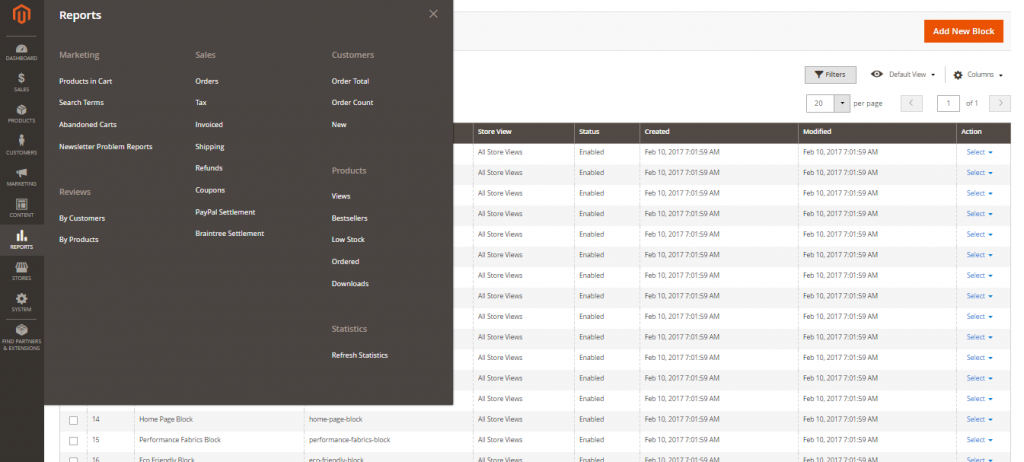
In the Reports menu, you will have insight into aspects of your stores comprising marketing, sales, customers, reviews and products. About marketing, you can view products in cart, search terms, abandoned carts or newsletter problem reports in detail. Moreover, orders, tax, invoice, shipping and more can be supervised in sales as well as order and new accounts report are listed in customers section so that you can manage them effectively. In terms of products, you can see reviews and other necessary information about products such as view or bestsellers.

reports-admin-sidebar

8. Stores

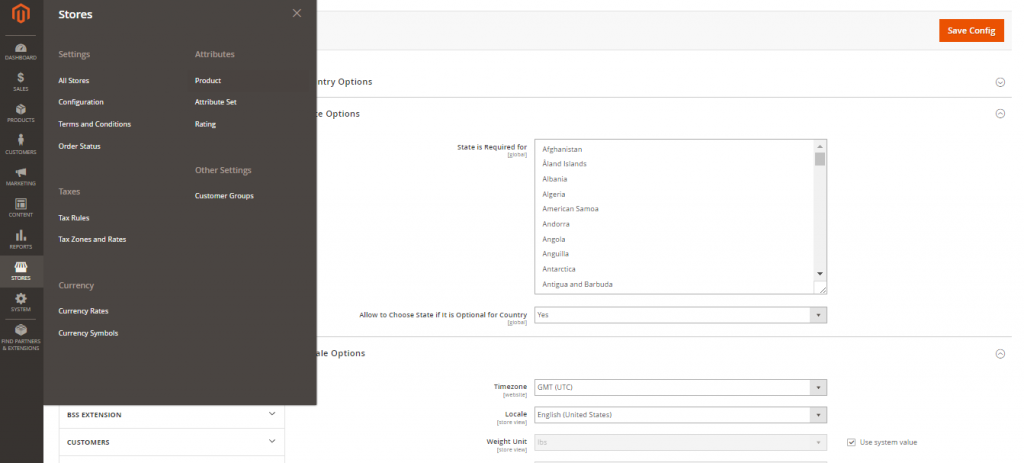
The Stores menu helps you manage the store hierarchy, configuration, sales and order settings, tax and currency, product attributes, product review ratings, and customer groups.

stores-admin-sidebar

9. System

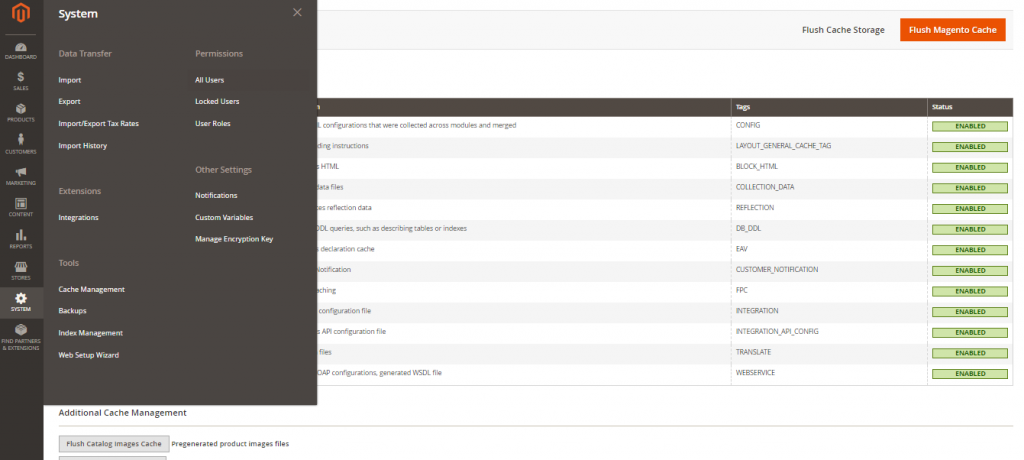
The System menu supports you in importing and exporting data via data transfer, setting up extensions, managing system caches and indexes, permissions, backups, system notifications or custom variables.

system-admin-sidebar

10. Find Partners & Extensions

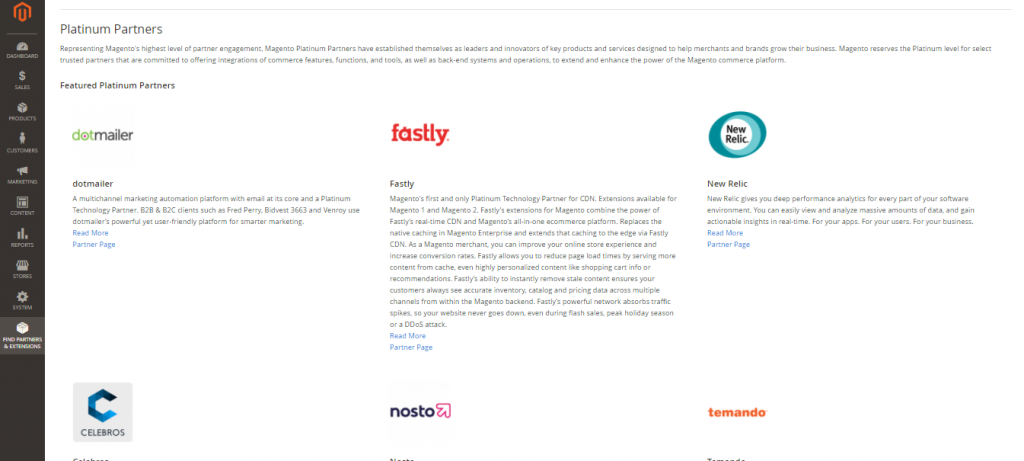
This Magento marketplace allows you to have knowledge of platinum partners of Magento or search other partners by visiting the Magento Partner Directory. You can also find solutions for your store with extensions and themes which are essential components of the Magento Ecosystem.

partners-extensions-admin-sidebar

We hope that you have collected helpful information by reading this article. If you have any question, please feel free to contact us.

An Overview of Product Workspace in Magento 2

Creating product(s) is the very primary step to build an online store. First of all, you need to determine which product type your new item belongs to. There are 6 types of products in Magento 2: Simple product, Configurable product, Grouped Product, Virtual Product, Bundle Product, and Downloadable Product. Each of those types has its own features that differentiate themselves from others. In this section, you will find information about how to create a product of each type in Product Workspace

The first part of studying how to create a new product for your online store is to learn about Product Workspace. Product Workspace is a section in which a set of basic information of a new product is performed. It is not exactly the same for all types of product, but configured by admin in the categories and attributes setup part.

Product Workspace
Product Workspace

It is crucial that every single product need to have a Name, a unique SKU for controlling activities and a unit price to sell. Other fields can be either optional or mandatory, it is up to attributes setting.

Enable Product: Indicates the online status of a product:

  • “Yes” : The product is currently online.
  • “No” : The product is currently offline.

Attribute Set: The attribute set of a new product will have effect on what kind of information you need to add to your product description. For example, if you choose Bottom for the Attribute Set, some kind of information like Color, Size, … might be required. But if you choose Gear the Category Gear field will show up.

Add Attribute: This button allows admin to add an attribute for a product. For example, you may want to add the Manufacturer Attribute to your new bag to provide more detailed information to customers in the homepage.

Save Menu: Magento 2 offer store owners three saving options after creating new products.

  • Save: Store up the current product, and continue working.
  • Save & New: Save and close the current product, then open a new product grid right right on click. This new product grid is base on the same product type and template. It is especially helpful when admin want to create a number of products in the same product type.
  • Save & Duplicate: Like the second option, its function is to save and close the current product. However, this selection will open a new duplicate copy.
  • Save & Close: Save the current product and come back to the Inventory workspace.

    Save Menu Product Workspace
    Save Menu

That is a brief information about how to create a new product and what the Product Workspace is. Follow our later blogs to get more information.