Complete Guideline About Stores Menu In Magento 2

  1. What is Stores menu in Magento 2?

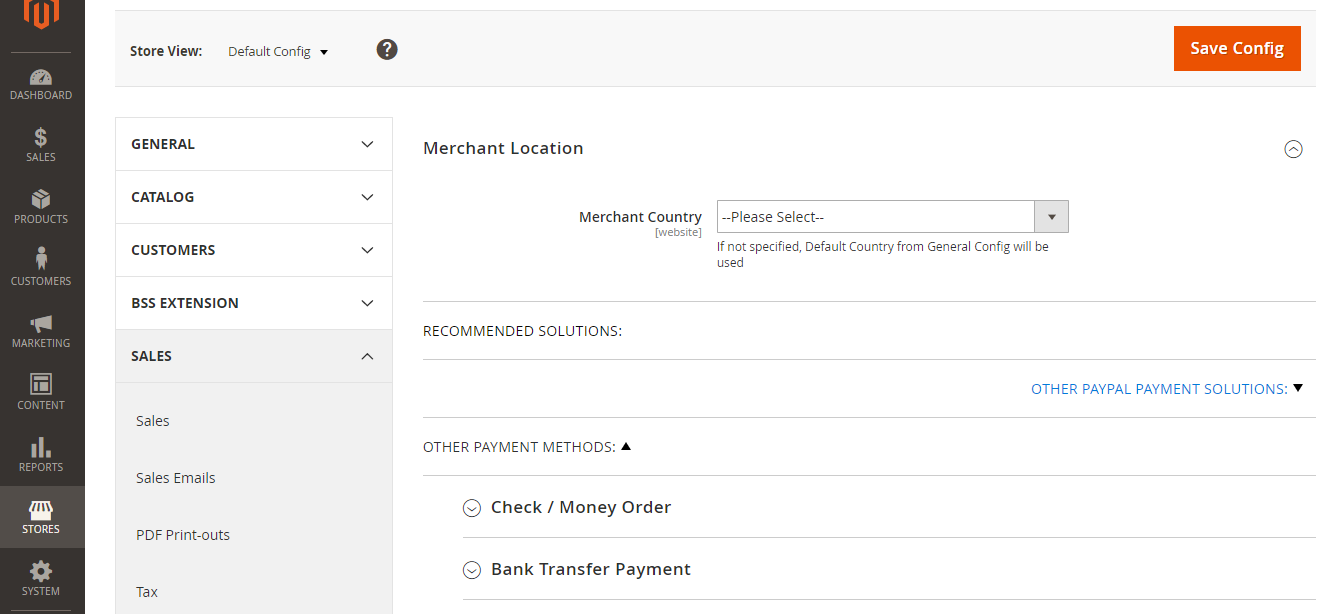
Stores menu in Magento 2 is a section in the admin sidebar, and this section lies near the bottom. Store administrators rarely have to do anything in Stores menu, but the settings of Stores menu affect your Magento installation, from setting up the store hierarchy, configuration, tax and currency, sales and order settings, product attributes, product review ratings, and customer groups. To open the Stores menu, click Stores in the admin sidebar. In this article, we will analyze all sections are included in Stores menu in Magento 2 Open Source

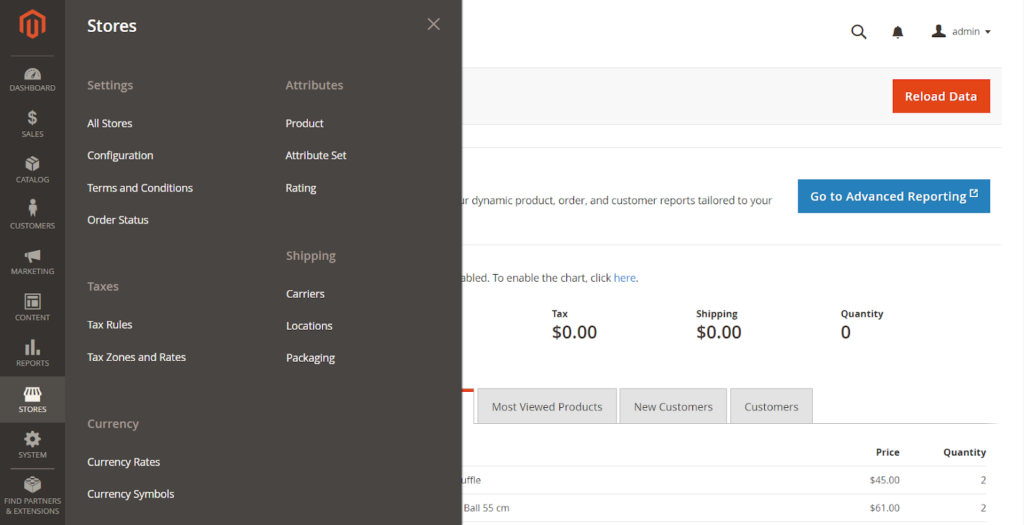
The menu options of Store contains Settings, Attributes, Taxes, Shipping and Currency

stores menu in magento 2
Stores Menu
  1. All Stores

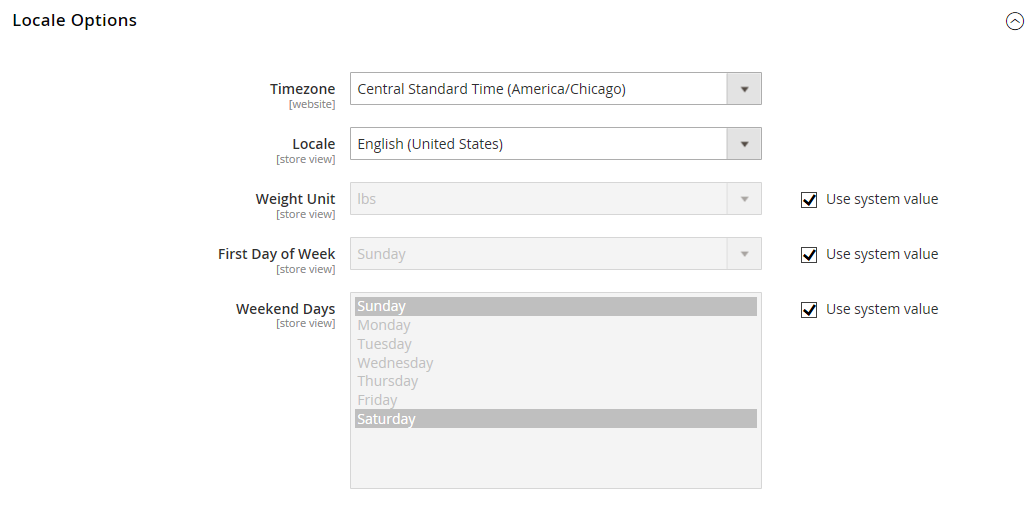
All Stores section control the hierarchy of websites, stores, store views and all configuration settings. Store administrators can also set up Term and Condition, and manage order status settings.

After installed Magento Open Source, the installation created a hierarchy that includes a main website, store, and store view. Additional websites, stores, and store views can be formed by store administrators as they needed. For example, you can have an additional websites with a different domain in addition to your main website. You can have multiple stores for each websites, and different store views for each store. To support different languages, many installations have one website, and one store includes multiple store views.

Because of the store hierarchy is referred to throughout the configuration, so you have to plan your store hierarchy before you begin. Every single store can have a different root category, which makes each store to have an entirely different set of main menu options.

Above is a guideline about Stores Menu and All Stores section in Stores Menu. If you have any question, feel free to leave a comment. Don’t forget to subscribe Magestandard to read more Magento 2 guideline articles.


An Overall View of Locale Options in Magento 2

This article today will help you answer questions relating to store locale in Magento 2: What is Locale Options? How to Set Locale Options in backend?

Locale Options

What is Locale Options?

Language, country, tax rate and other settings utilized throughout the store are shown in the locale section. The locale options allow admin to set the time zone and language used for each store. Moreover, you can also determine the days of the work week in your area including first day of week and weekend days.

How to Configure the Store Locale

You can follow this instruction to set your own store locale

  1. Choose Stores on the Admin Sidebar -> Select Configuration under Settings.
  2. Under General in the left panel, tap General.
  3. Widen the Locale Options part.
  4. Choose your Timezone from the list and do the following:
  • Locale: Select the appropriate store language among existing choices.
  • Weight Unit: Set the unit of measurement that is commonly used for shipments from your locale. There are 2 options for you: pounds (lbs) or kilograms (kgs).
  • First Day of the Week:  Customize the day that is known as the first day of the week in your area.
  • Weekend Days: Choose the days which fall on a weekend in your locale. (To select many options, hold down the Ctrl (PC) or Command (Mac) key).
  1.  Click Save Config to finish all steps.

Conclusion

Provided above is the overall view and instruction about setting locale options in Magento 2. Please feel free to contact us if you have any query and don’t forget to follow other articles to receive more interesting details about Magento 2.

A Quick Introduction of Merchant Location in Magento 2

In the previous articles, we gave you some explanation about configuration in store details section of Magento 2. To continue providing other details about basic configuration, this article today will show you a quick introduction of merchant location in Magento 2.

What is Merchant Location?

Merchants are known as the wholesalers or retailers who may purchase goods from other sources for the purpose of resale to anyone to make profit. In Magento 2, configuring the merchant locale is the first step for setting payment methods. After that, you can customize payment methods as wish by expanding provided selections. If no value is entered into the merchant location part, the default country setting from general configuration is utilized.

merchant location

Configure the Merchant Locale

You can easily set the merchant position by following this instruction:

  1. Select Stores on the Admin sidebar -> Tap Configuration under Settings.
  2. Choose Sales in the left panel -> Scroll down and select Payment Methods section.
  3. Widen the Merchant Location area and then choose any country as your Merchant Country from the existing list.
  4. Click Save Config to finish all steps.

In Conclusion

Provided above is the quick introduction of merchant location in Magento 2. We hope that you can get useful information about the merchant locale section in this article. If you have any question about merchant location or any topics relating to Magento 2, please feel free to contact us. Lastly, don’t forget to share and follow our site to receive more interesting articles.

How to Customize Country Options in Magento 2

In the previous articles, we gave you detailed information about locale options, state options and how to configure them in Magento 2. This article today will show you how to customize country options in Magento 2.

magento2-country-options

Introduction of Country Options

The country options determine the country where you locate your business and the countries from which you accept orders. With the country options section, you can set default country, allow countries that doesn’t require ZIP/Postal code, European Union countries and top destinations list.

To Configure the Country Options for your store

  1. Choose Stores on the Admin sidebar -> Tap Configuration under Settings.
  2. In the left panel, select General under General.
  3. Widen the Country Options and do the following:

a. Determine the Default Country where your business is located from the existing list.
b. In the Allow Countries list, decide each country from which you accept payment. All countries in the list are marked by default. You can hold down the Ctrl (PC) or Command (Mac) key to select many countries at a single time.
c. In the Zip/Postal Code is Optional for section, select each country where you do business that doesn’t need a ZIP or Postal code entered as a part of the street address.
d. In the European Union Countries part, choose each country from the EU countries list where your business is conducted. By default, all EU countries are selected.
e. In the Top Destinations field, you can target the primary countries for sales by choosing the adequate countries from the list.

  1. Click Save Config to finish all steps.

In Conclusion

Provided above is the instruction of configuring the country options in Magento 2. If you have any question, please feel free to ask us and keep following our site to receive other useful Magento 2 guides.

An Easy Guide to Set Up State Options in Magento 2

The state, province or region is considered as a necessary part of a postal address in many countries in the world. In this article, we will show you how to set up state options in Magento 2.

magento2-state-options
magento 2 state options

Details about State Options

The state or province is the information used for shipping and billing information, to calculate tax rates and so on. However, there are some countries where the state is not required. With these countries, the field can be totally ignored from the address or added as an arbitrary field.

In addition, there are differences between typical address formats of countries. Hence, you can also customize the template that is utilized to form the address for invoices, packing slips, and shipping labels.

How to Configure the State Options

  1. Choose Stores on the Admin sidebar -> Tap Configuration under Settings.
  2. Select General under General part in the left panel.
  3. Widen the State Options field and do this instruction:

a. In the State is Required for section, choose each country where region/state is a compulsory entry from the existing list.

b. Set the Allow to Choose State if It is Optional for Country part to one of the following options:

  • “Yes”: Adding the State section as an optional entry for countries where the state part is not obligatory.
  • “No”: Eliminating the State section in countries where the state part is not needed.
  1. Select Save Config to finish.

In Conclusion

We have shown you an easy guide to customize the Magento 2 state options . Please feel free to contact us if you have any query and don’t forget to follow our other articles to get more information about Magento 2.