
As we said in previous articles, store administrators can use a Content Delivery Network (CDN) to store media files. Although the version of Magento that is installed “on-premise” does not include integration with any specific CDN, store administrators can choose and use their CDN. Magento Commerce (Cloud) consists of the Fastly CDN. To learn more, see Fastly in the Magento developer documentation.
After configuring the CDN, you must complete the configuration from the Admin. You can make the changes at either the global or website level. When a CDN is used for media storage, all paths to media on store pages are changed to the CDN paths that are specified in the configuration.
CDN Workflow
- Browser requests media: A page from the web store opens in the browser, and the browser requests the media that is specified in the HTML.
- Request sent to CDN; images found and served. First, the request is sent to the CDN. If the CDN has the images in storage, the media files will be served to the browser.
- Media not found, request sent to Magento web server. If the media files are not available in the CDN, the request is sent to the Magento web server. If the media files are available in the file system, the web server sends them to the browser.
For security reason, JavaScript may not work correctly if the CDN is placed outside of the subdomain when a CDN is used as media storage.
Follow these steps to configure a content delivery network for Magento 2 media storage:
On Admin sidebar click Stores > Under Settings click Configuration > Under General click Web. Set Store View as needed, open the Base URLs tab and follow these steps:
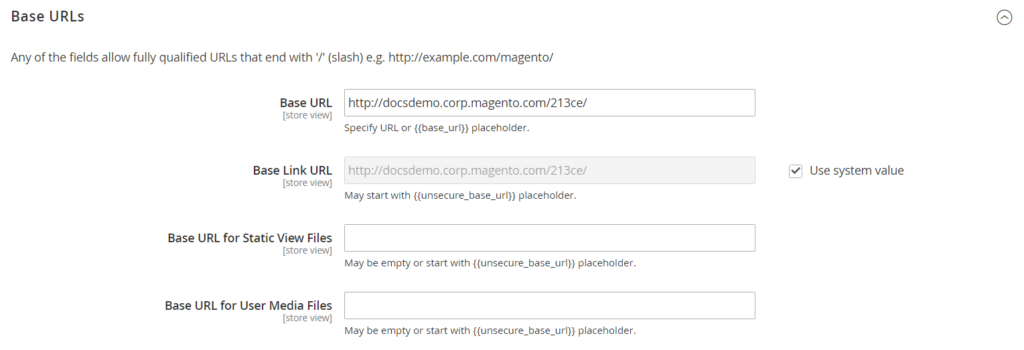
Enter the URL of the location on the CDN where static view files are stored to the Base URL for Static View Files.
Enter the URL of the JS files on the CDN to the Base URL for User Media Files.
You can empty these field or can start with the placeholder: {{unsecure_base_url}}
Open the Base URLs (Secure) tab:
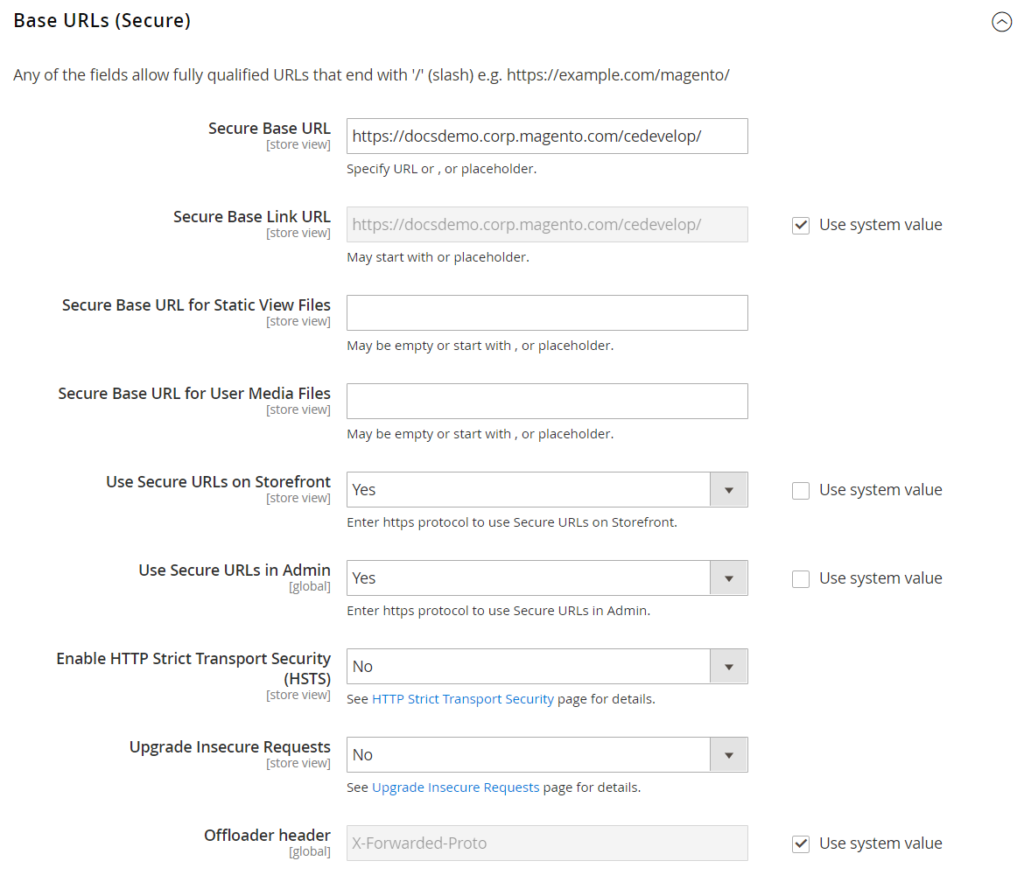
Do the same as above and click the Save Config