When you sign in to the Admin, dashboard is usually the first page that you can see. In this article, we will give you detailed information about dashboard in Magento 2.
What is Dashboard?
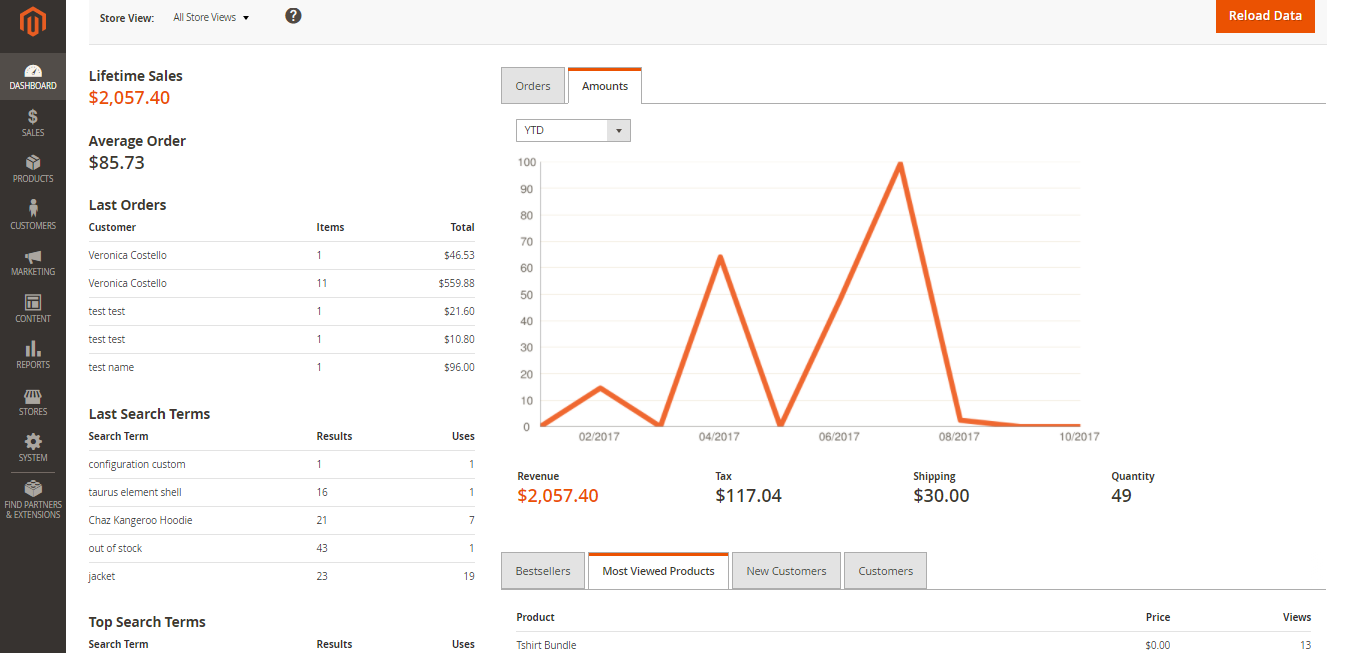
The dashboard containing an overview of sales and customer activity usually appears as the first page when you log in to the Admin. With the blocks on the left, you can view information such as lifetime sales, average order amount, the last five orders, last and top search terms. Regarding the graph, it shows you the orders and amounts for the selected date range. The tabs above the graph can be used to switch between two views. Moreover, you can create dashboard snapshot reports for each store view. The quick reports include details about your best-selling and most viewed products, new customers and those who have purchased the most as well.
Although the dashboard is the default startup page for the Admin, you can display another page when logging in by changing the configuration. In addition, you are capable of customizing the starting dates in dashboard reports or deactivating the display of the charts.
Customize the Chart
- Select Stores on the Admin sidebar -> Choose Configuration under Settings. Then you can do any of the following:
Activate Charts
a. Tap Admin under Advanced in the left panel
b. Apply Yes to Enable Charts in the Dashboard part
Configure the Beginning Dates
a. Select Reports under General in the left panel
b. Do the following in the Dashboard section:
- Set Year-To-Date Starts to the Month and Day
- Set Current Month Starts to the Day
Select the Data Source
The performance of the dashboard can be enhanced by switching off the display of real time data in case you have a lot of data to process.
a. Widen Sales in the left panel -> Tap Sales
b. Expand the Dashboard section then do the following:
- Apply Yes to Use Aggregated Data (beta) for real-time data
- Apply No to Use Aggregated Data (beta) for historical data
Alter the Startup Page
a. Widen Advanced in the left panel -> Select Admin
b. Expand the Startup Page section
c. Select the page that you want to set as the Startup Page when logging in to Admin
- Click on Save Config to finish
We have shown you an overview of the dashboard in Magento 2. If you have any question, please feel free to contact us.