Obviously, online store owners will have to communicate with their associates and customers. For that purpose, they will need different store email addresses. There are at least five kinds of email addresses divided by their capacities or divisions for store or view individually. Furthermore, not only following predefined email identities but also two custom identities can be set up to meet the demands.
- General Contact
- Deals Representative
- Client Support
Every single personality and its correlated email address can be related with particular mechanized email messages and represent as the sender of email messages that are dispatched from your store.
Step 1: Set Up the Email Addresses for Your Domain
First of all, make sure each email address must be set up as a legitimate one for your domain before they are configured for the store. Follow the directions from your server director or email facilitating supplier to send each email which is required.
Step 2: Configure the Email Addresses for Your Store
- Open the Admin sidebar, tap Stores. Next, under Settings, Click Configuration.
- On the panel on the left under General, choose Store Email Addresses.

- Click the General Contact section, there are two sections and each must be typed differently followed the instructions:
- In the Sender Name field, type the name of the person to appear as the sender of any email messages that is related with the General Contact identity.
- In the Sender Email field, type the related email address.
- Repeat this process for each store email addresses which has been scheduled to be used.
- Affter complete, tap Save Config .
Step 3: Update the Sales Email Configuration
In case you utilize custom email addresses, warrant to refresh the design of any related email messages so the proper identity can be showed up as the sender.
- Open the board on the left, under Sales, Click Sales Emails. The page has a different area for each of the following:
- Order and Order Comments
- Invoice and Invoice Comments
- Shipment and Shipment Comments
- Credit Memo and Credit Memo Comments
- Starting with Order, broaden the segment for each message, and ensure that the right sender is chosen.
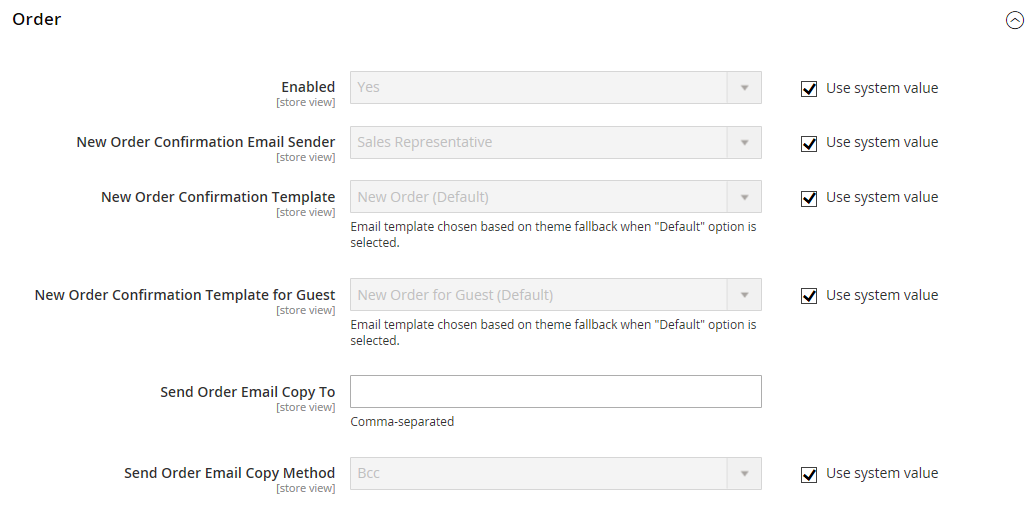
3. To Finish, tap Save Config.